


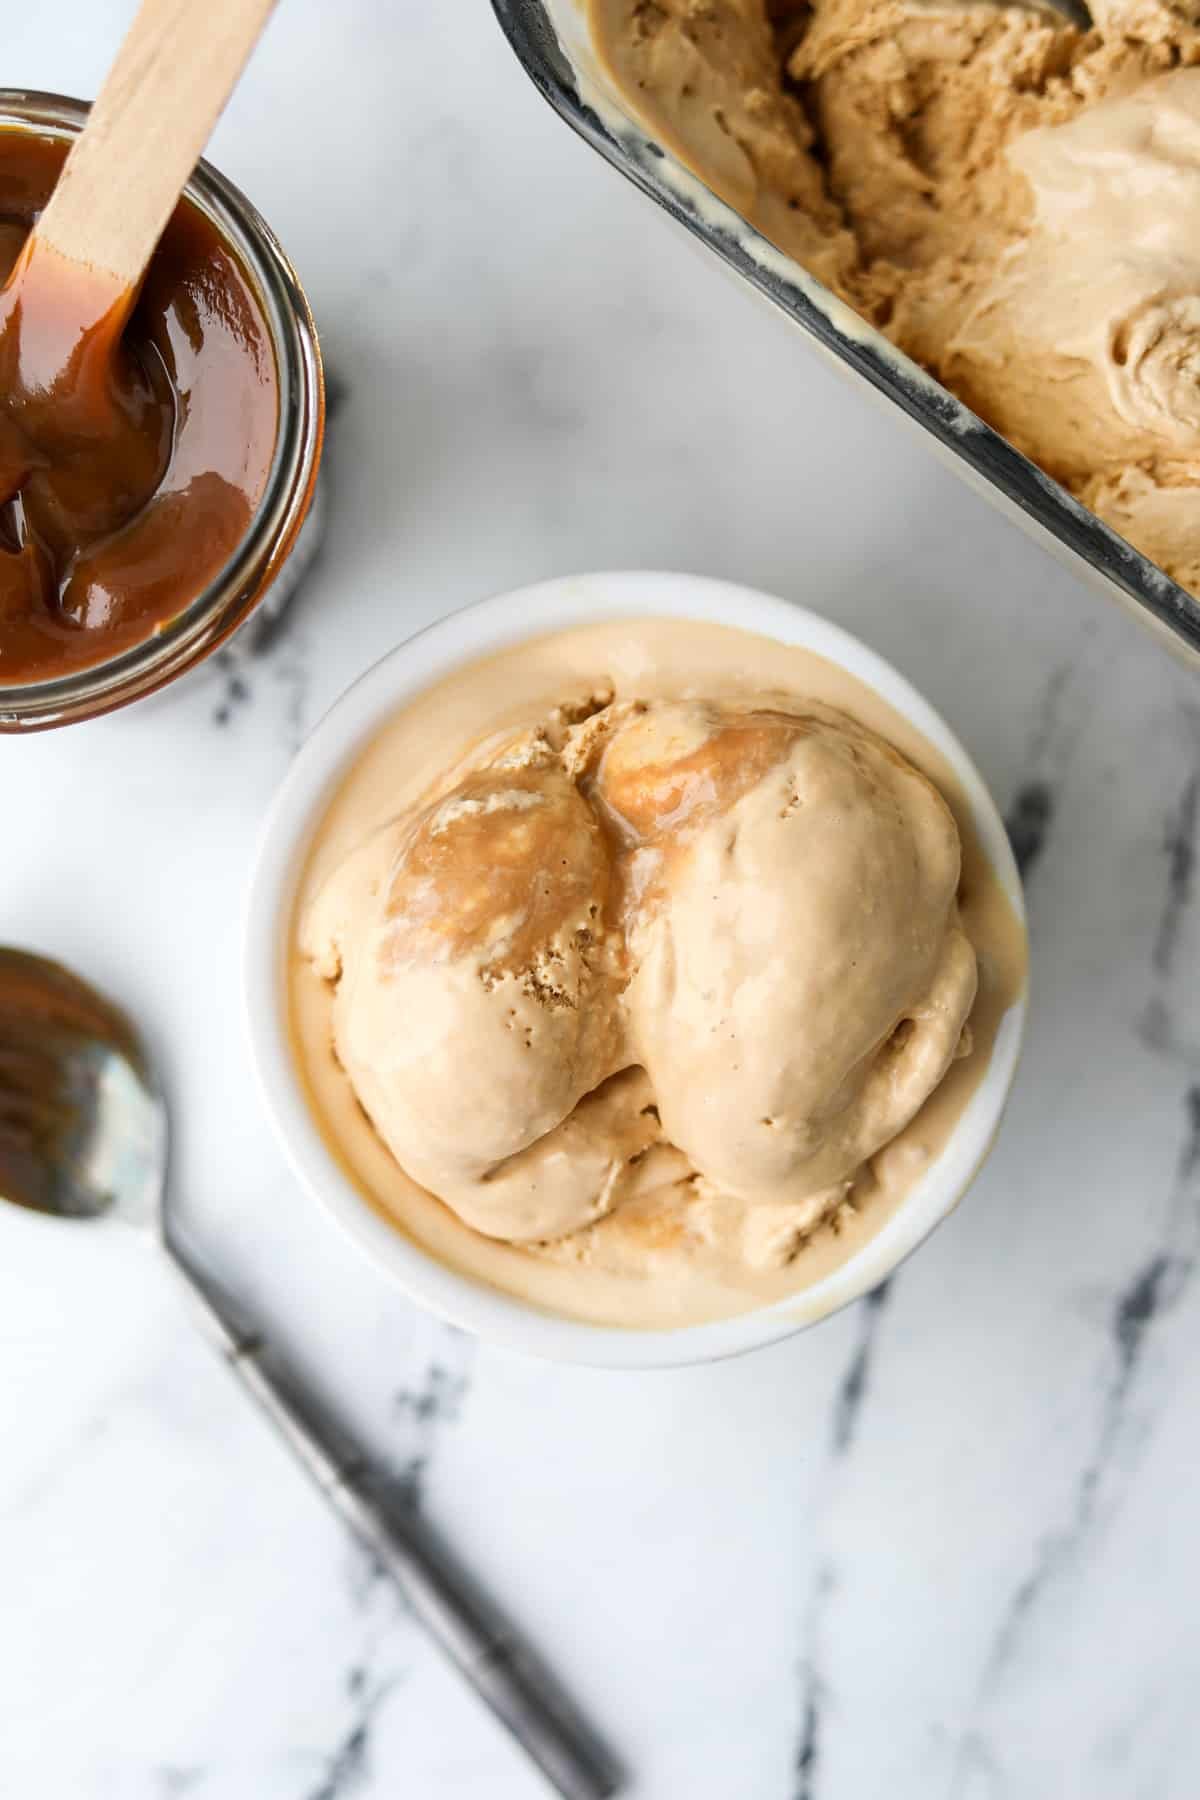
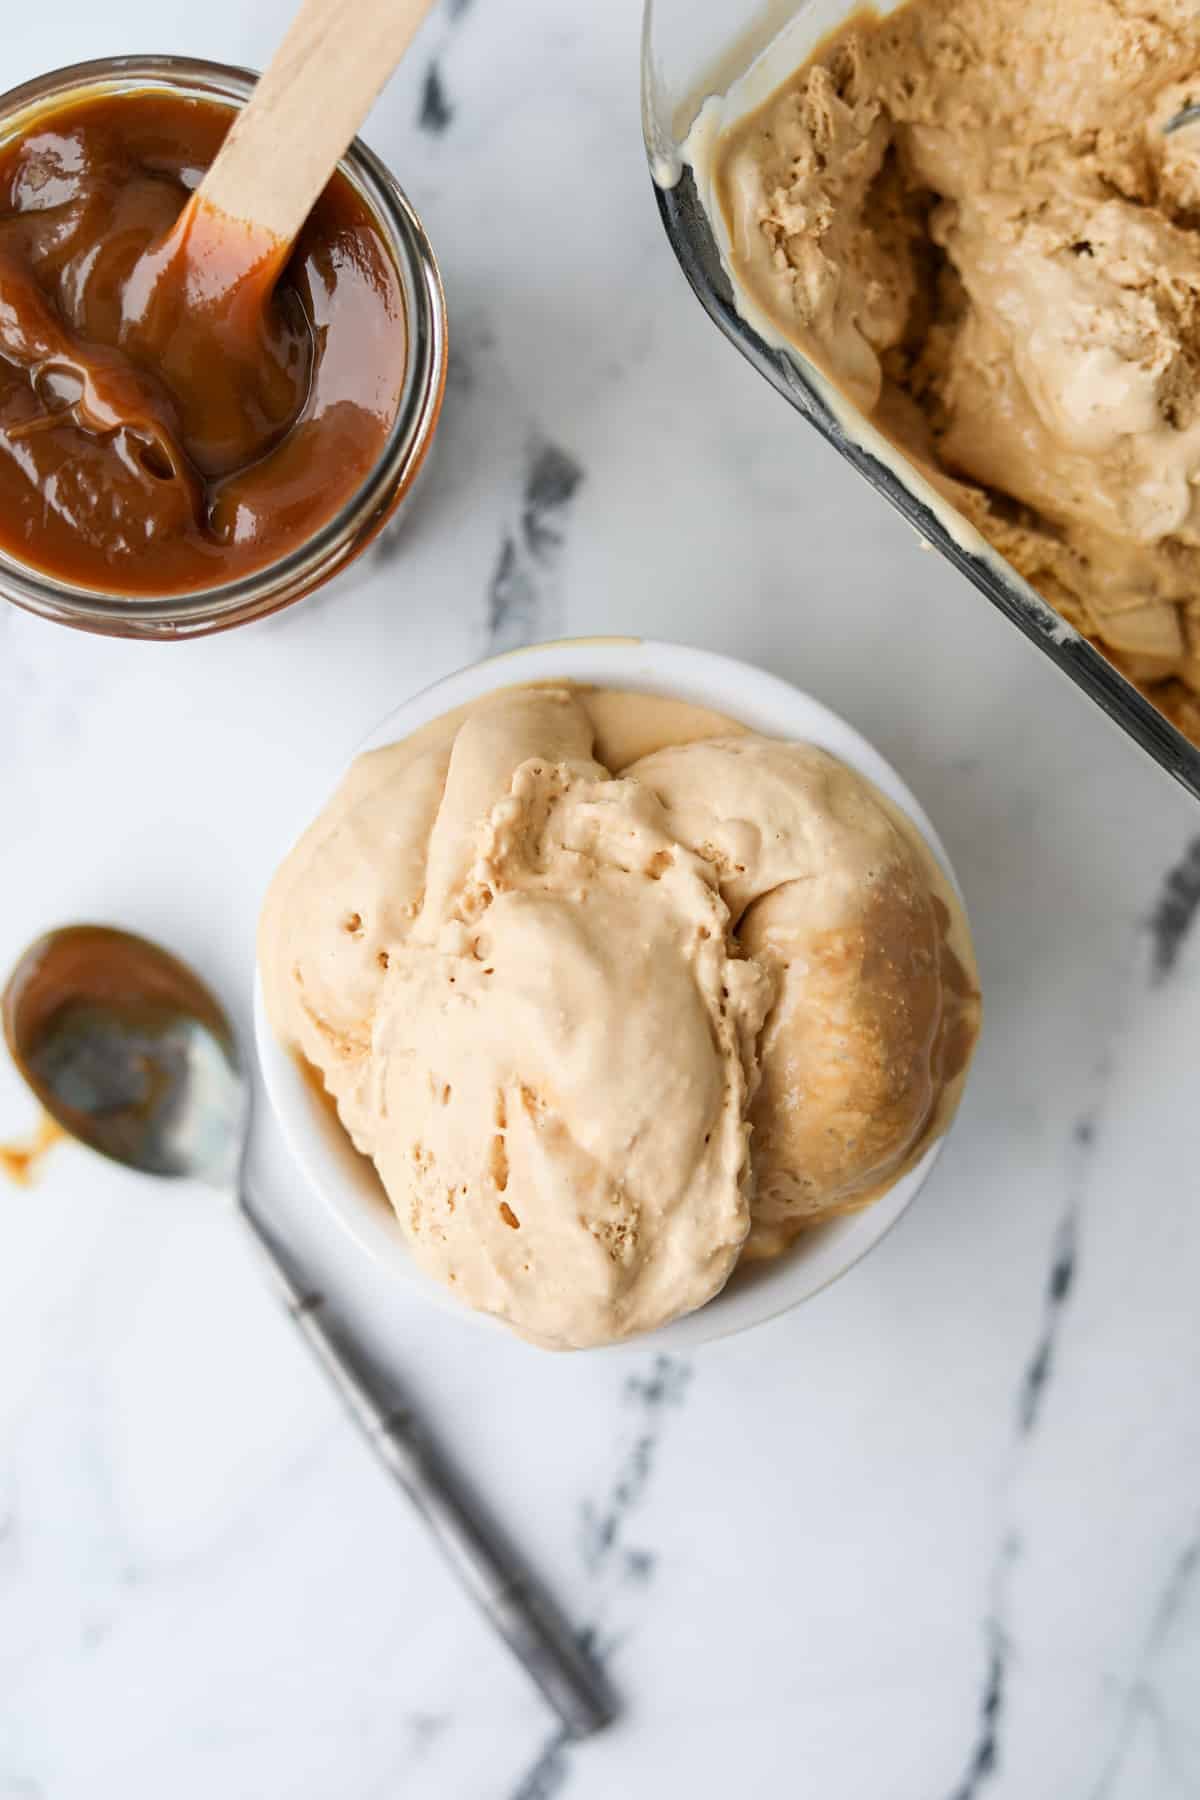
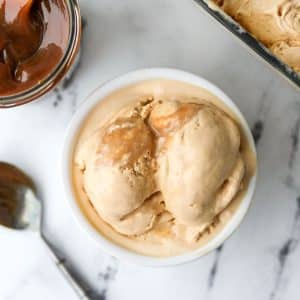
If you're in love with Latin America's treasured dessert filling, you're going to love this homemade dulce de leche ice cream! A rich caramel ice cream is made with 3 basic ingredients and features milky dulce de leche ribbons throughout. Scoop it into ice cream cones, or enjoy it straight from the freezer!
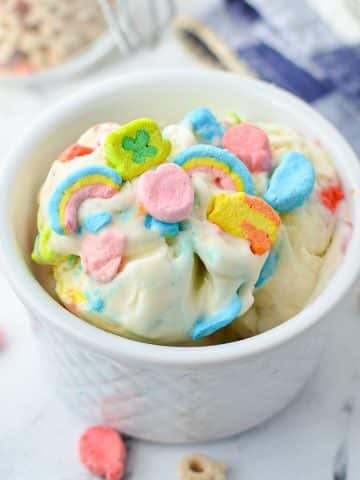
Recently I've shared my no-churn ice cream recipes for Lucky Charms Ice Cream and Mini Egg Ice Cream, and so I thought it would be fun to have a version featuring one of my favorite flavors. That's right, it's time for Dulce de Leche ice cream!
What is Dulce de Leche?
Dulce de leche is popular in much of Latin America, but particularly in Argentina and Brazil. It is a sweetened milk that has been cooked until thick, dark in color, and caramel-like in flavor. You'll see it used in all kinds of desserts - everything from flan to alfajores. It also makes a delicious addition to pancakes, waffles, coffee, or pretty much anything that could use a dose of caramel-y goodness.
While caramel and dulce de leche are similar, they are different in many ways! Dulce de leche is not your average caramel - it's ultra sweet, pourable, and milky in flavor. You can find it in most grocery stores, or you can even make it yourself using sweetened condensed milk.
This easy recipe for homemade Dulce de Leche Ice Cream is sure to become a favorite in your home. It's perfect for everything from a hot Summer's day to celebrating Cinco de Mayo (since it is also incredibly popular in Mexico!).
Reasons to Love This Recipe:
- No ice cream maker! Just whip, mix and freeze.
- It requires just 3 simple ingredients! No egg yolks, corn syrup, or soy lecithin needed!
- It's a richly indulgent experience with easy steps and no fancy equipment.
- Who needs Haagan-daz when you can make your very own Dulce de Leche Ice Cream at home?
Ingredients
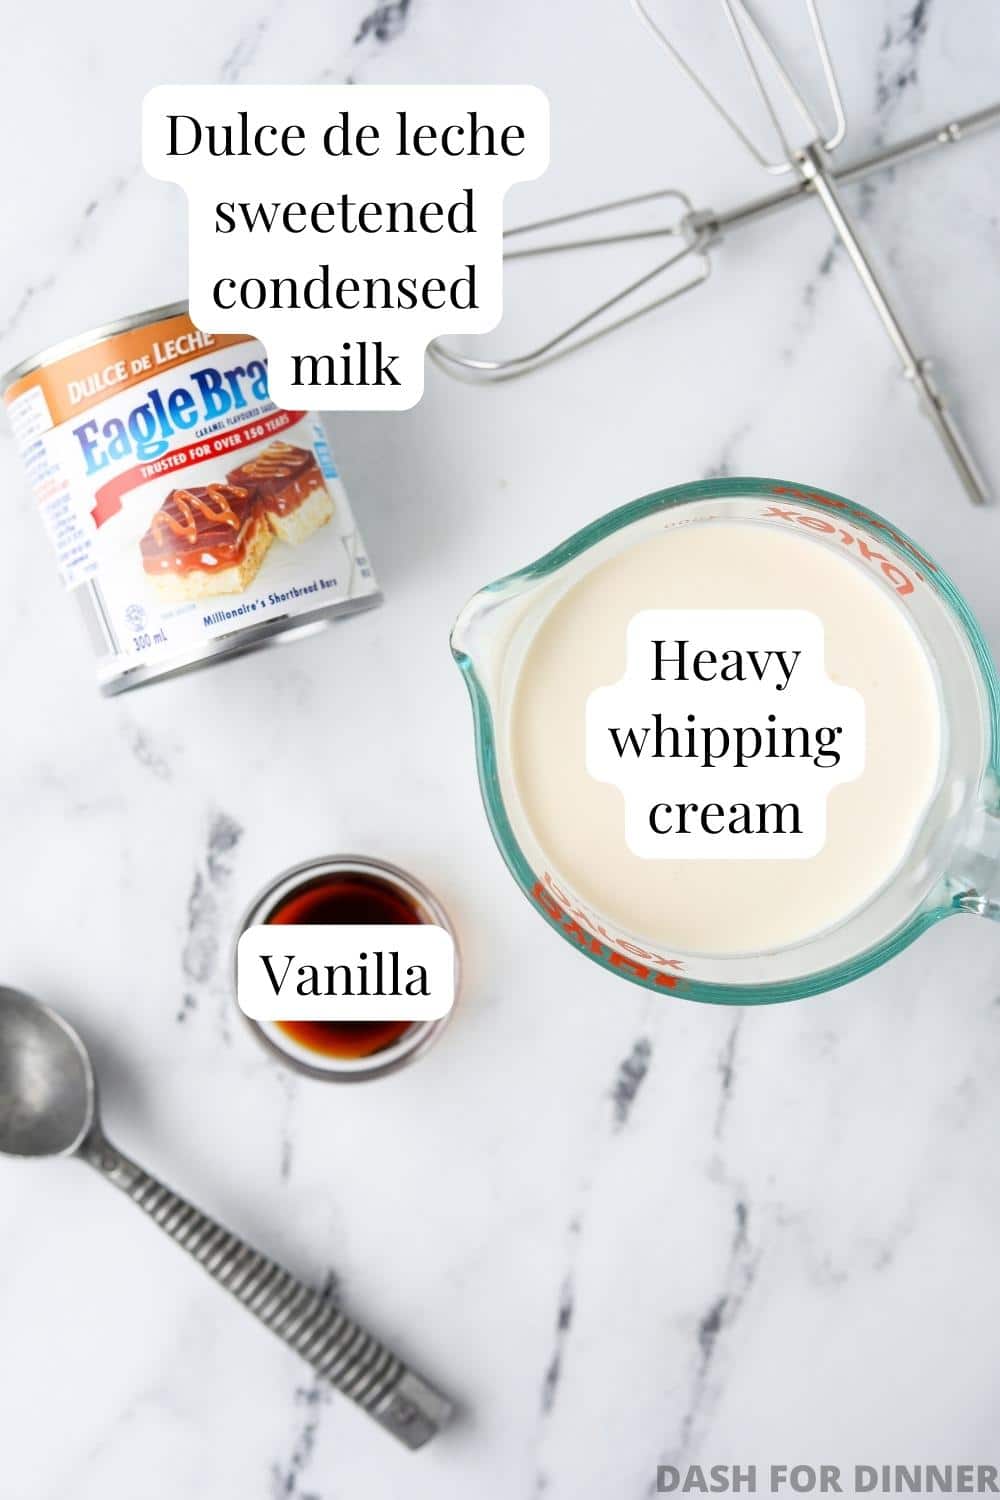
- Heavy cream: You'll need 2 cups of chilled heavy cream. The high fat content makes for an ultra-creamy result. Using very cold cream makes whipping much easier, so keep it in the fridge until you need it.
- Dulce de leche: You want to purchase the sweetened condensed milk "dulce de leche" variety. This is a bit thinner than specialty dulce de leche but is perfect for making ice cream. Both Nestle La Lechera and Eagle Brand make this product.
- Vanilla: I like to add a little vanilla extract to compliment the caramel-y flavor of the dulce de leche.
- For swirling: An additional ½ cup of dulce de leche swirled into the ice cream creates the most delicious ribbons of golden caramel. This is optional, but if you do opt for it I recommend using a thicker, specialty brand of store-bought dulce de leche.
Equipment
- Electric mixer: I recommend either an electric hand mixer or a stand mixer. Either one of these will ensure you can whip your heavy cream to stiff peaks with ease.
- Loaf pan: You'll also need a standard loaf pan (or ice cream freezing container) that is freezer safe. For the best results, chill it in the freezer for 30 minutes before making the ice cream base.
How to Make Dulce de Leche Ice Cream
Step one: Prepare a loaf pan by lining it with parchment paper (if desired). Place it in the freezer to chill for 30 minutes if possible.
Step two: Pour a full can of sweetened condensed milk dulce de leche into a large bowl.
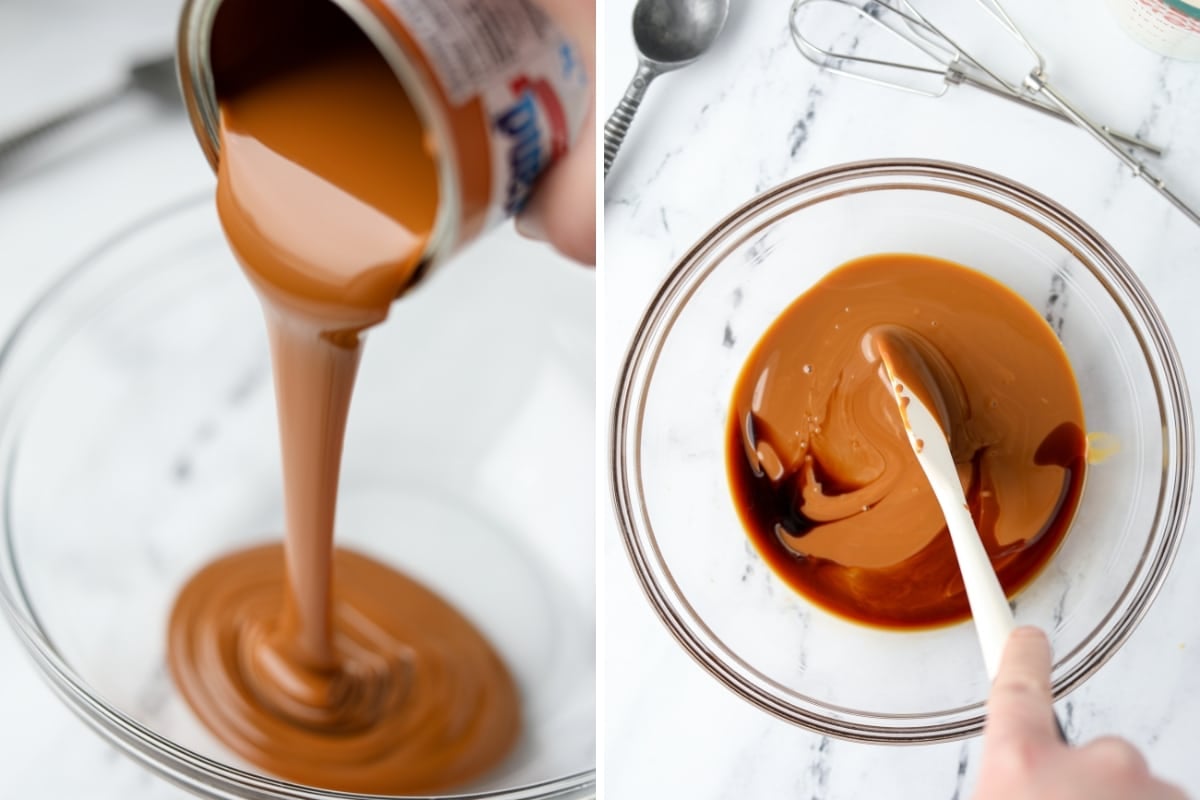
Step three: Add the vanilla extract and stir to combine. Set aside.
Whipping the Cream
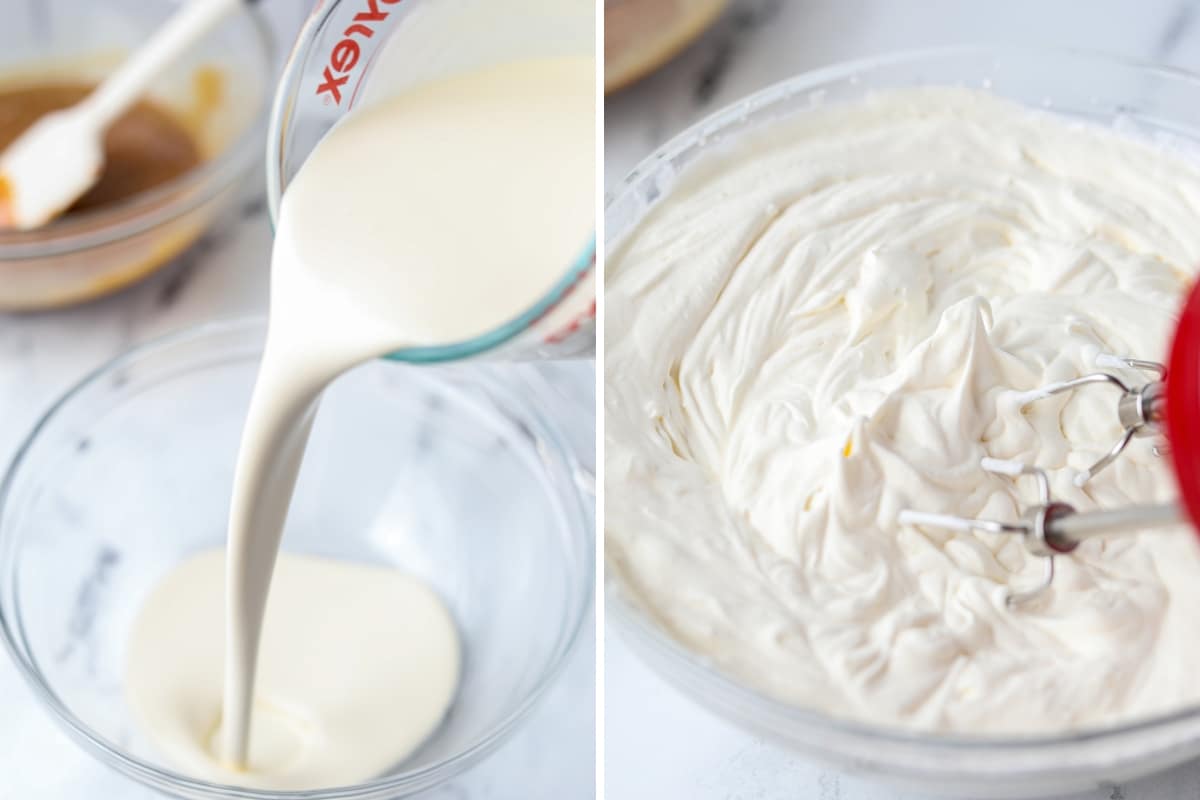
Step four: In a separate large bowl (or the bowl of a stand mixer), add 2 cups of chilled heavy cream.
Step five: Mix the cream of medium-high until stiff peaks form (AKA the whipped cream holds its shape when you pull one of the beats out).
Combing the Dulce de Leche and Whipped Cream
Step six: Add the whipped cream on top of the dulce de leche and vanilla mixture.
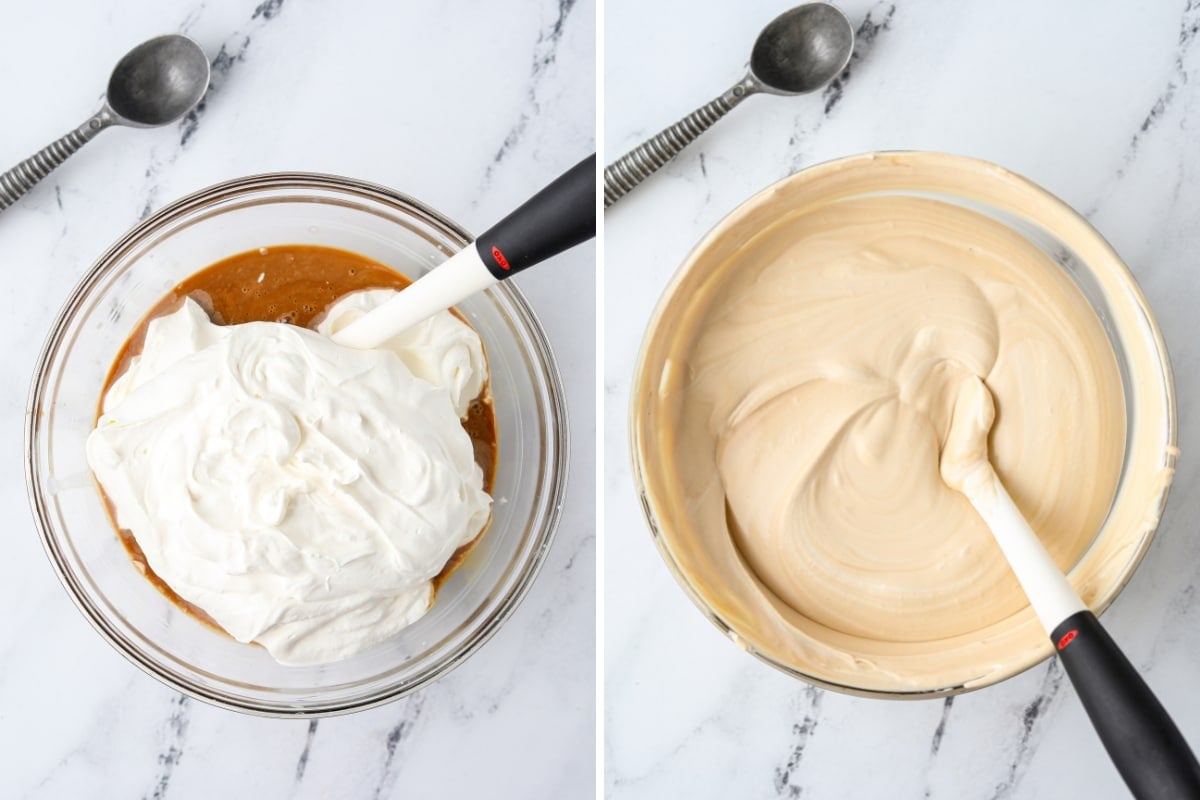
Step seven: Use a silicone spatula to gently fold the dulce de leche and whipped cream until smooth. Be careful not to mix too much, as you don't want to deflate the whipped cream.
Adding the Dulce de Leche Swirl
Step eight: Add about half of the dulce de leche and whipped cream mixture to the prepared loaf pan, then drizzle on about ¼ cup of dulce de leche (if using).
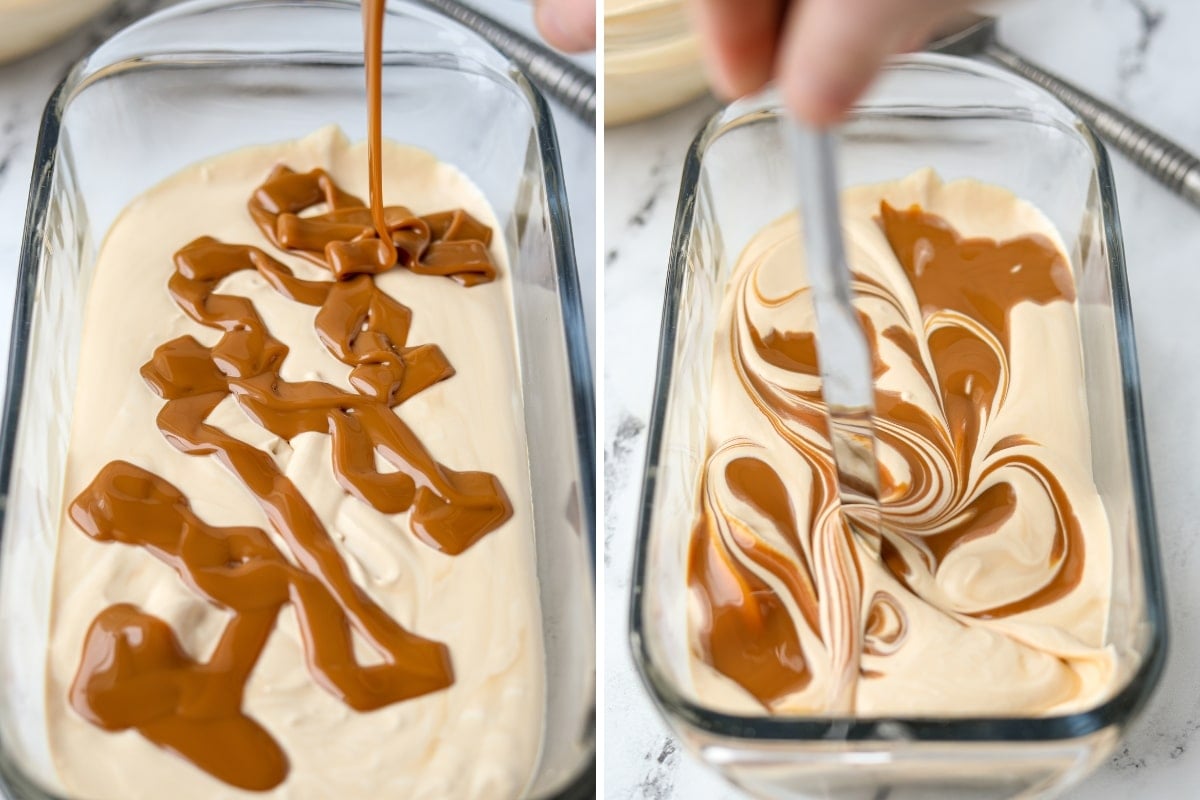
Step nine: Use a butter knife or toothpick to swirl the dulce de leche into the ice cream base.
NOTE: It's not uncommon for some of the dulce de leche swirl to sink toward the bottom during the freezing period. Using a chilled loaf pan will minimize this.
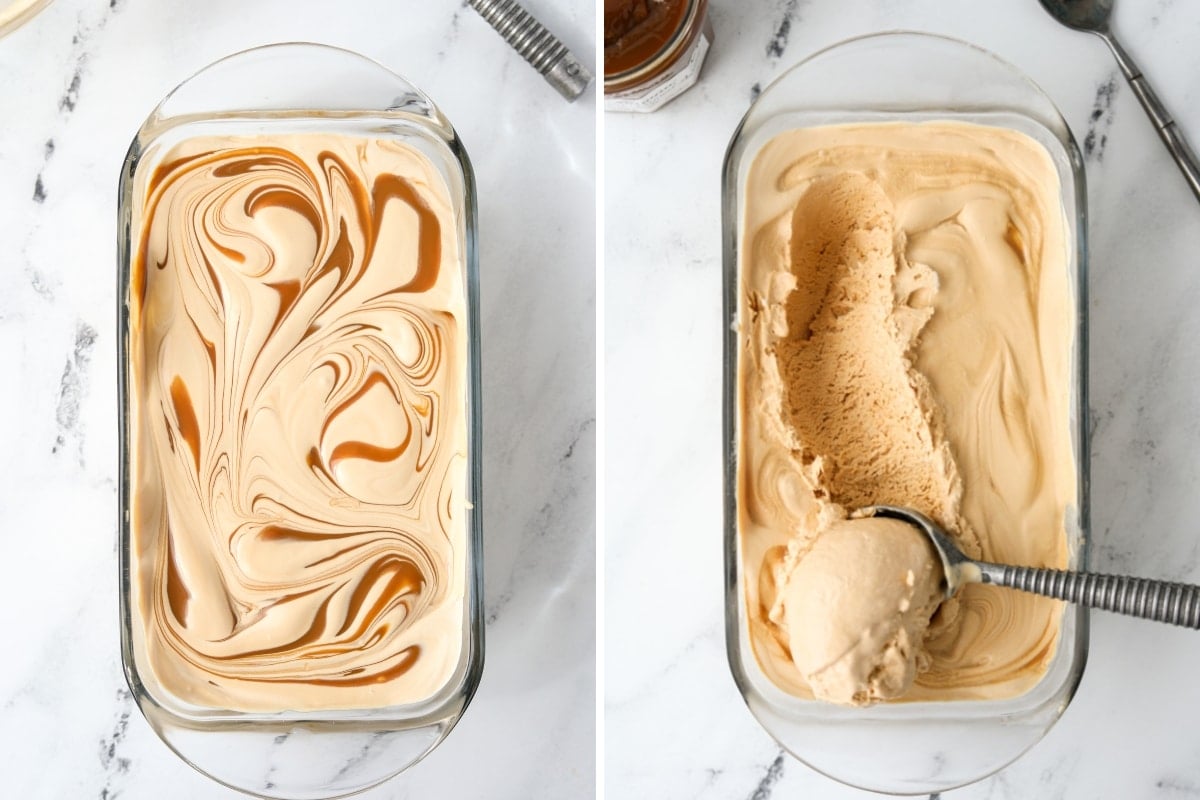
Step ten: Add the remaining half of the ice cream to the loaf pan, then the remaining dulce de leche (if using). Swirl, just as you did in the previous step.
Step eleven: Cover the ice cream and place it in the freezer to chill for at least 6 hours, although 12 hours is ideal.
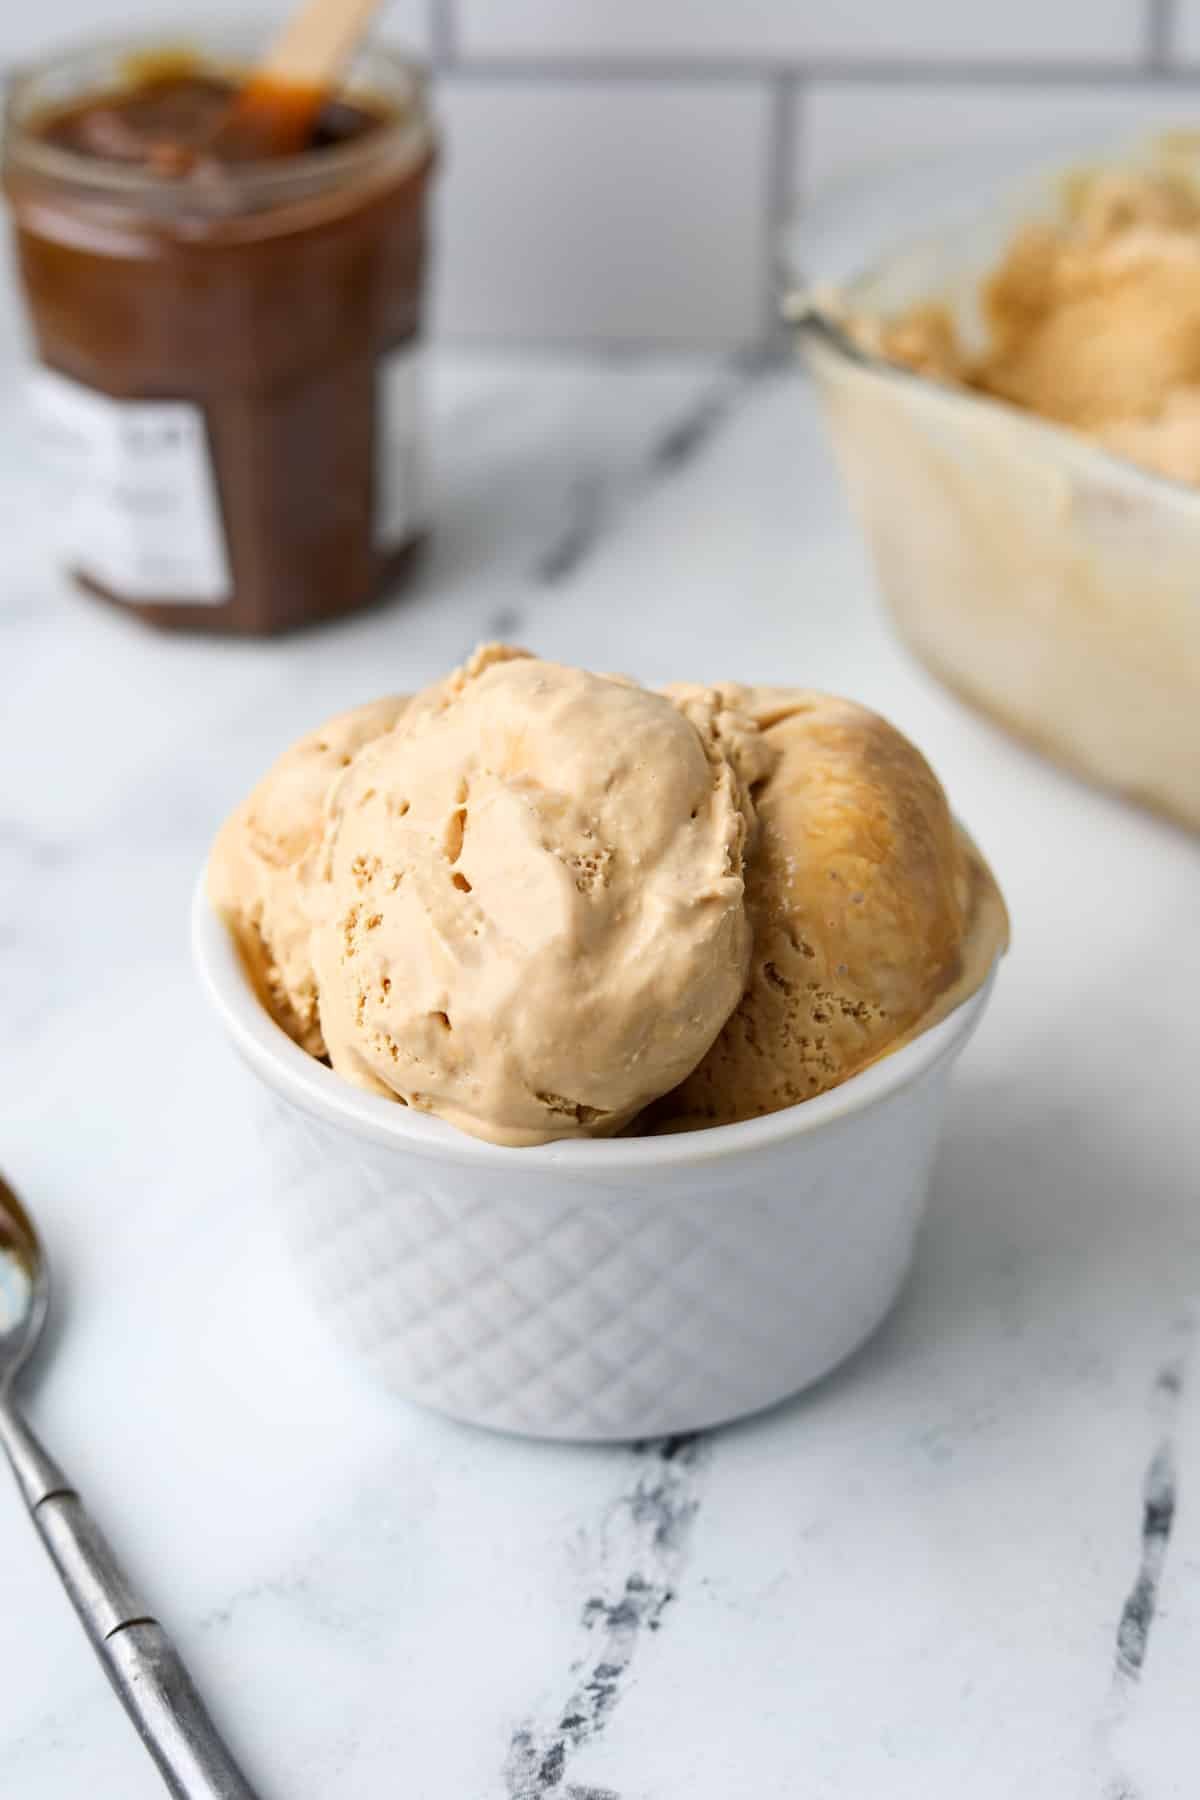
Step twelve: Scoop and serve! Top with additional drizzles of dulce de leche if you're really feeling indulgent!
Tips for Storing Leftover Homemade Ice Cream
- Wrap the loaf pan with a double layer of plastic wrap or aluminum foil and store in the freezer for 1-2 weeks.
- For slightly longer storage (1-2 weeks), transfer the ice cream to an airtight container and place it in the freezer to chill.
- For the longest storage, transfer to a freezable ice cream container and store for up to 3 weeks.
- Your homemade ice cream will maintain its quality best when kept in a deep freezer. The freezer attached to your fridge is opened often, increasing the risk of freezer burn.
Tips & Tricks for Homemade Ice Cream
- The best ice cream is made when you keep your ingredients (and tools) chilled. Preventing the shock from warm ingredients to a cold freezer helps your ice cream freeze more easily, and ensures that it chills in a timely manner without becoming difficult to scoop.
- For creamy ice cream ALWAYS use heavy cream. Some recipes will substitute half of the heavy cream for milk, or use milk in its place, but rich homemade ice cream is always better when you use heavy whipping cream.
- Place the loaf pan (or freezable container) in the freezer for 30 minutes before you start making your ice cream. I've tested with and without chilling and using a pre-chilled loaf pan consistently yields better results.
Recipe FAQ's
Although dulce de leche and caramel taste quite similar, there is a significant difference between the two that makes them two very different products. Dulce de leche is made by caramelizing sweetened milk (sugar + milk), while caramel is made by cooking sugar until melted, browned, and very hot. Butter is often added to the cooked sugar, making a creamy and indulgent sauce.
Dulce de leche ice cream is made with a simple ice cream base, which often includes sugar, cream, milk, and eggs. Homemade versions are often made with sweetened condensed milk and heavy cream, as a means to avoid the use of raw egg yolks (and make the recipe no-churn). In addition to the base ingredients, you will see ribbons of dulce de leche throughout the ice cream.
Dulce de leche ice cream is the closest in flavor to caramel ice cream. It has a slightly more milky flavor, whereas caramel has more of a buttery flavor, but it will taste quite similar to someone who does not know the difference.
More Easy Desserts
- Lucky Charms Ice Cream
- Mini Egg Ice Cream
- Dulce de Leche Mousse
- Lazy Cheesecake Salad
- Berry Cheesecake Salad
If you loved this recipe for Dulce de Leche ice cream, let me know by leaving a 5-star review in the recipe card or comment below! You can also tag me on Instagram @dashfordinner.
Dulce de Leche Ice Cream
Equipment
- Stand mixer or electric hand mixer
Ingredients
- 2 cups heavy whipping cream chilled
- 14 ounces dulce de leche sweetened condensed milk
- 1 ½ teaspoons vanilla extract
- ½ cup dulce de leche optional
Instructions
- Line a 9X5 loaf pan with parchment paper and place it in the freezer to chill while you prepare the ice cream base.
- Add the dulce de leche sweetened condensed milk and vanilla extract to a large bowl and stir to combine. Set aside.
- Add the heavy cream to the bowl of a stand mixer fitted with the whisk attachment (or use a large bowl and an electric hand mixer).
- Mix the heavy cream on medium-high speed until stiff peaks form.
- Add the whipped cream to the bowl of dulce de leche and vanilla, and gently fold them together.
- Transfer half of the ice cream base to the chilled loaf pan and smooth it out into an even layer.
- Drizzle ¼ cup of dulce de leche on top of the ice cream layer, then use a butter knife to swirl it throughout the ice cream.
- Add the remaining ice cream base to the loaf pan, and repeat the drizzling and swirling process with another ¼ cup of dulce de leche.
- Cover the loaf pan with plastic wrap or foil and place it in the freezer to chill for at least 6 hours, although 12 hours is ideal.
- Once the ice cream is firm, serve and enjoy.
Notes
Nutrition
Please note that some of my blog posts here at Dash for Dinner may contain affiliate links. If you make a purchase through these links, I will get a small commission at no additional cost to you. Please see my Disclaimer for more information.

Leave a Reply