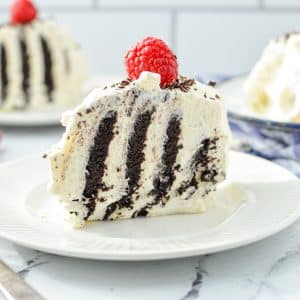
This chocolate wafer icebox cake is made with just 4 simple ingredients and is a no-bake recipe. Made with crisp chocolate wafer cookies and homemade whipped cream, this easy dessert is perfect for hot Summer days or special occasions.
Also known as Zebra Cake or Famous Chocolate Wafer Icebox Cake.
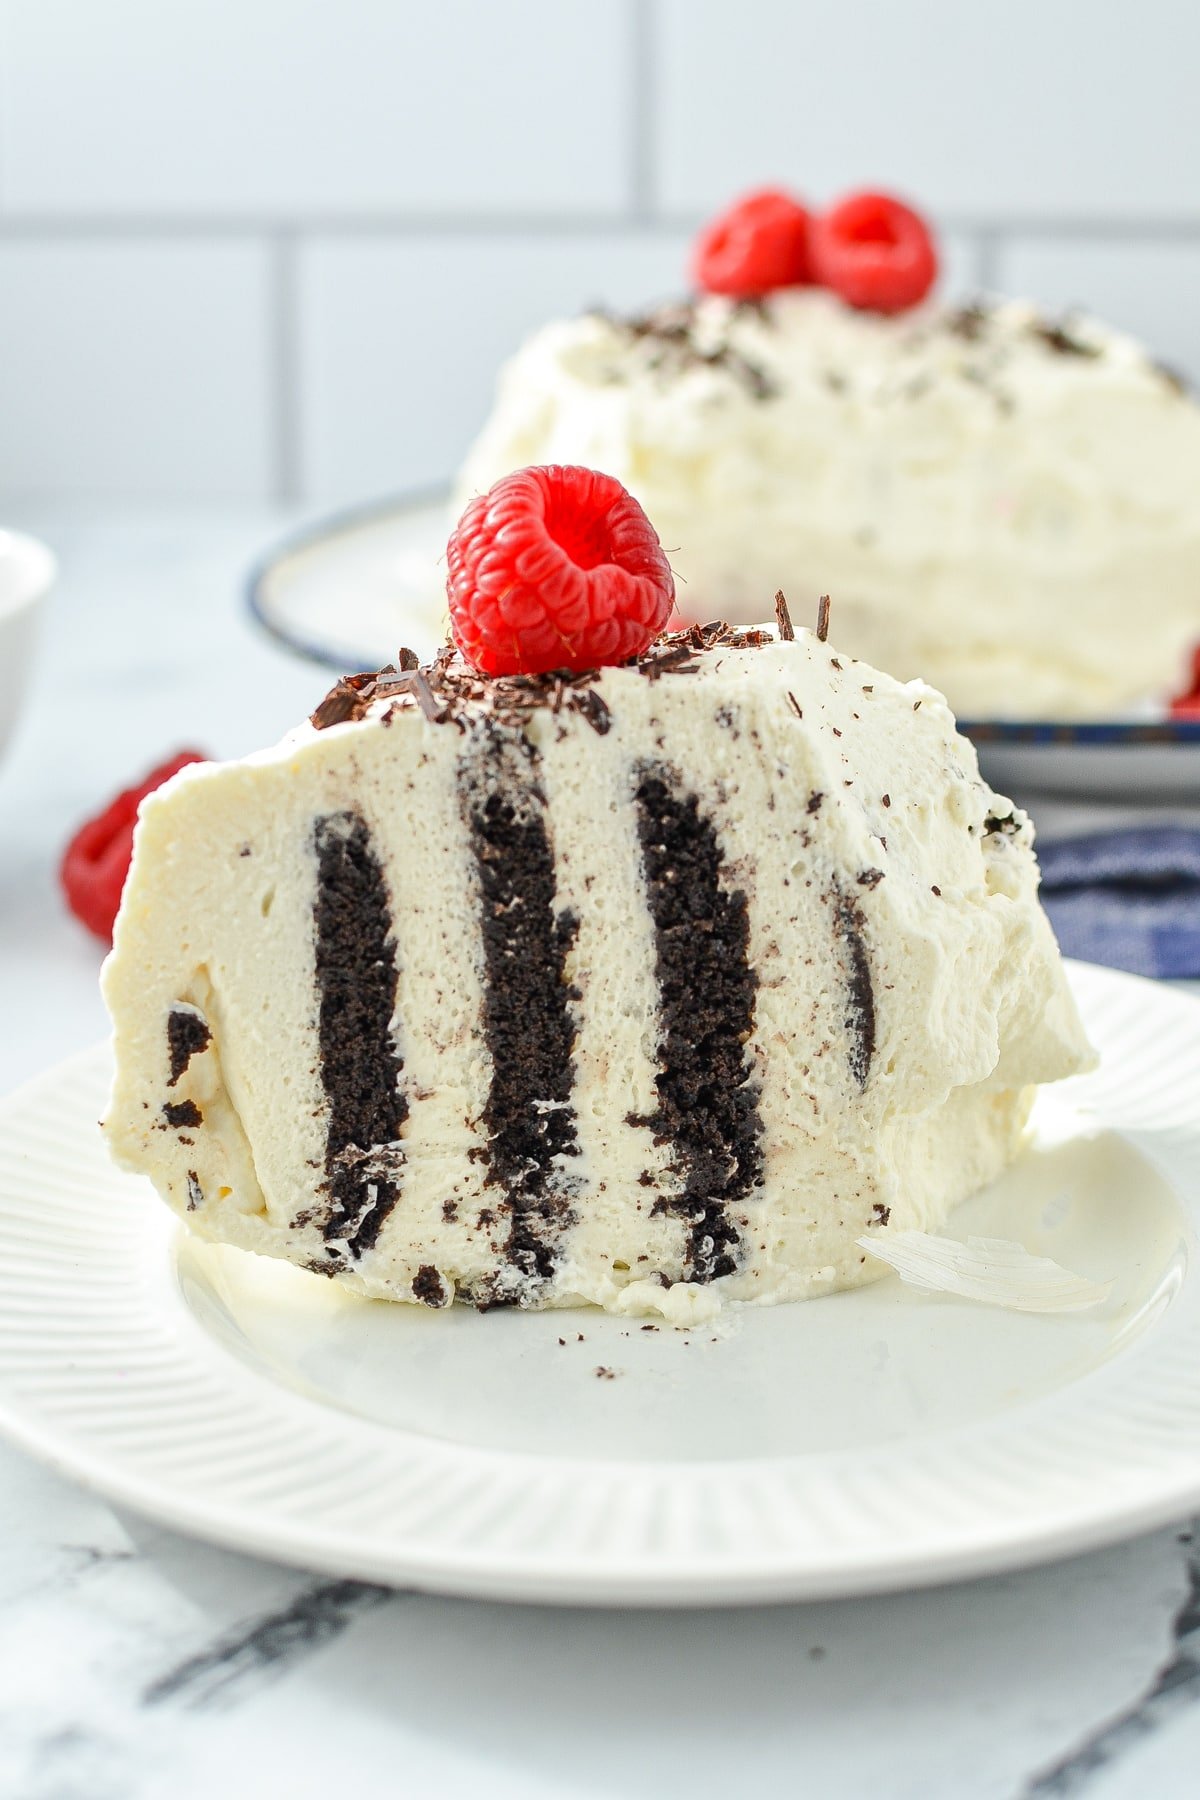
What is Zebra Cake?
I first heard about this cake when looking at various Depression-era recipes. This time of history always fascinates me, especially since it really isn't all that far in the past. My husband and I both had Grandparents who lived through it, so it's of particular interest.
Icebox cakes (like this chocolate wafer icebox cake) became popular during this time thanks to increased poverty, and later: sugar rations. Families were only allowed to purchase a certain quantity of certain ingredients, since a good chunk of the national supply needed to be sent overseas to feed the troops during WW2. During this time, easy recipes that used pre-packaged ingredients like cookies and crackers became very popular.
An Easy No Bake Dessert
Today, we love these shortcuts because we lead very busy lives. Between work, commute, and screen time, we don't tend to dedicate as much time to meal preparation - especially desserts.
This Zebra cake (also called Famous chocolate wafer icebox cake) is made with chocolate wafer cookies and whipped cream and requires zero oven time. You just have to assemble, chill, and then you're ready to slice and serve!
But best of all? It actually tastes great! My husband has requested this as his Birthday cake, and lucky me - it's a total cinch to make. The texture and flavors are like a very simplified black forest cake (hold the kirsch). I just know you're going to love it as much as we do!
Ingredients
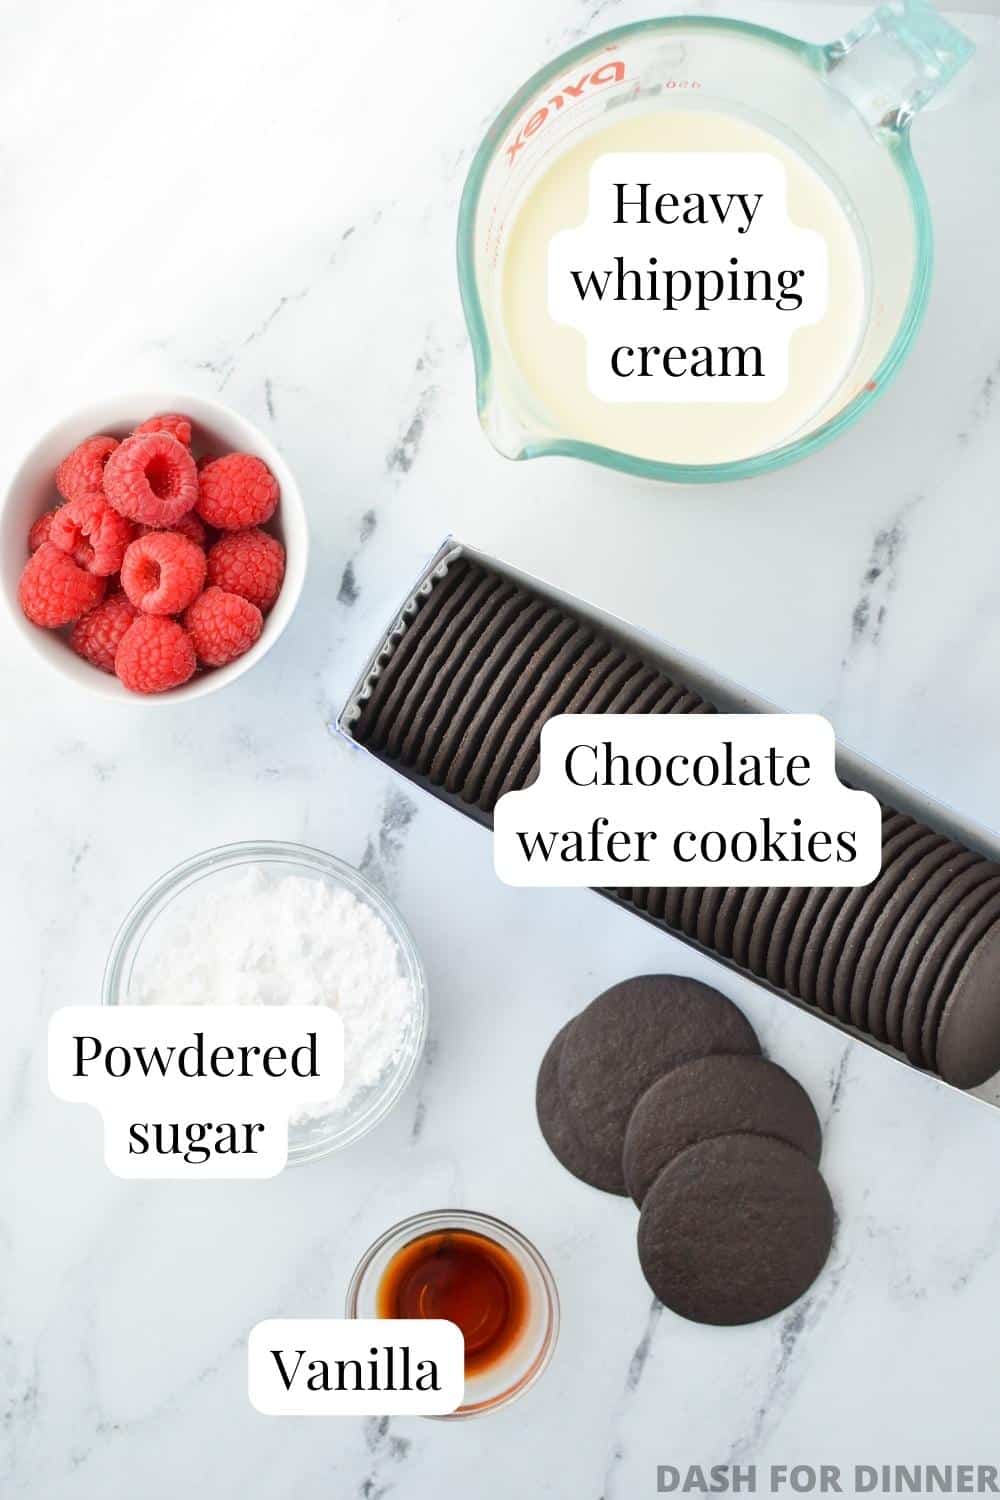
- Chocolate wafer cookies: These are made by Nabisco in the US and by Christie's in Canada. in the US they are branded "Famous Chocolate Wafers" and in Canada, they are simply "Chocolate wafers". You can find them in the cookie aisle in grocery stores, or grouped with the graham crackers.
- Heavy whipping cream: If you want to use homemade whipped cream (highly recommended), you're going to want to use heavy cream.
- Sugar: I recommend using powdered sugar (AKA confectioners' sugar)for the perfect texture and better stabilization. You could use regular granulated sugar if you prefer.
- Vanilla: A touch of vanilla extract is optional, but recommended.
Shortcut Option:
- Cool Whip: If you would prefer to take a shortcut, you can substitute the ingredients used for homemade whipped cream (heavy cream, sugar, and vanilla) and use a tub of Cool Whip instead.
For Garnish (optional)
- Chocolate shavings
- Fresh raspberries or strawberries
- Mint leaves
How to Make No Bake Chocolate Wafer Icebox Cake
Whipping the Cream
- Pour the heavy cream into the bowl of a stand mixer fitted with the whisk or paddle attachment. Or, use a large bowl with an electric hand mixer.
- Add in the powdered sugar and vanilla extract.
- Whip the cream, sugar, and vanilla on high speed until stiff peaks form - about 3-4 minutes.
- Stop the mixer and use the whipped cream as directed in the recipe.
Preparing the Cake
TIP: Line your platter with parchment paper before getting started for easy clean-up.
Step one: Smooth about ½-1 cup of whipped cream (or Cool Whip) into the center of a serving platter, forming a long, rectangular shape.
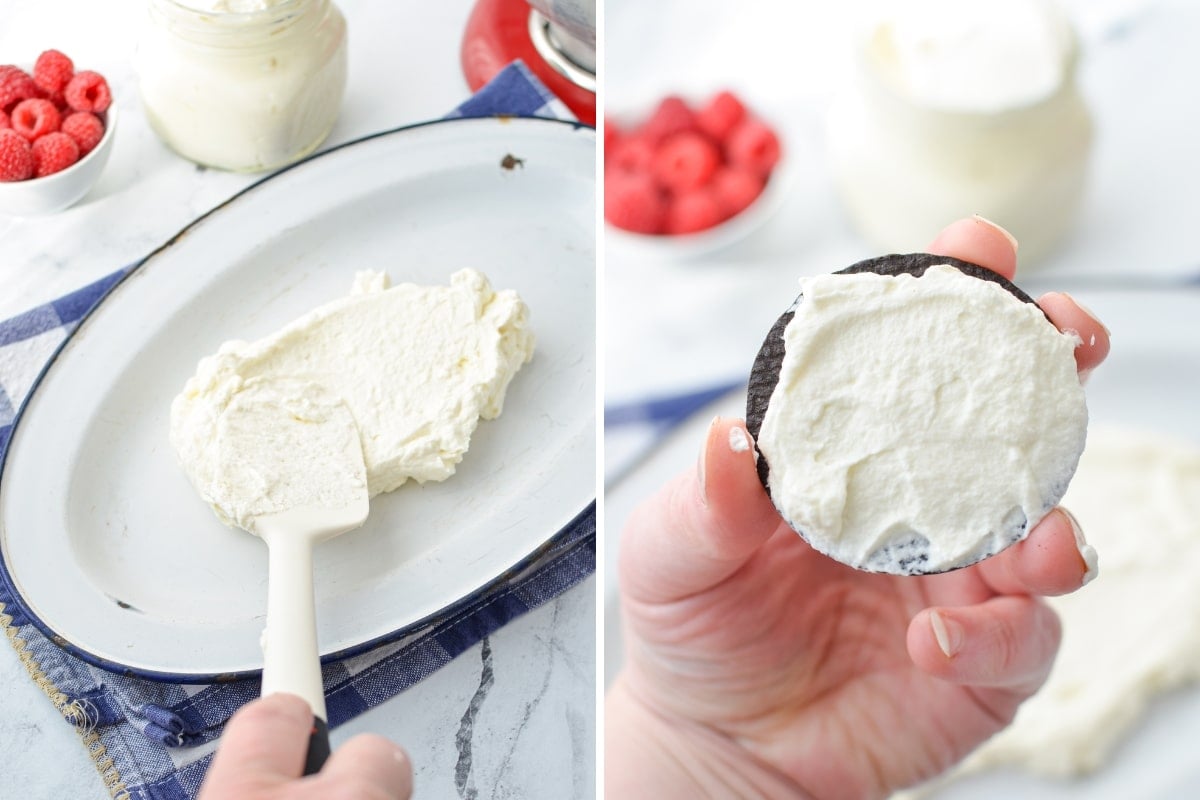
Step two: Spread a chocolate wafer cookie with a heaping tablespoon of whipped cream, sandwiching it with another cookie.
Step three: Place the sandwiched cookies on top of the rectangle of whipped cream, with their round sides facing left and right, forming a log.
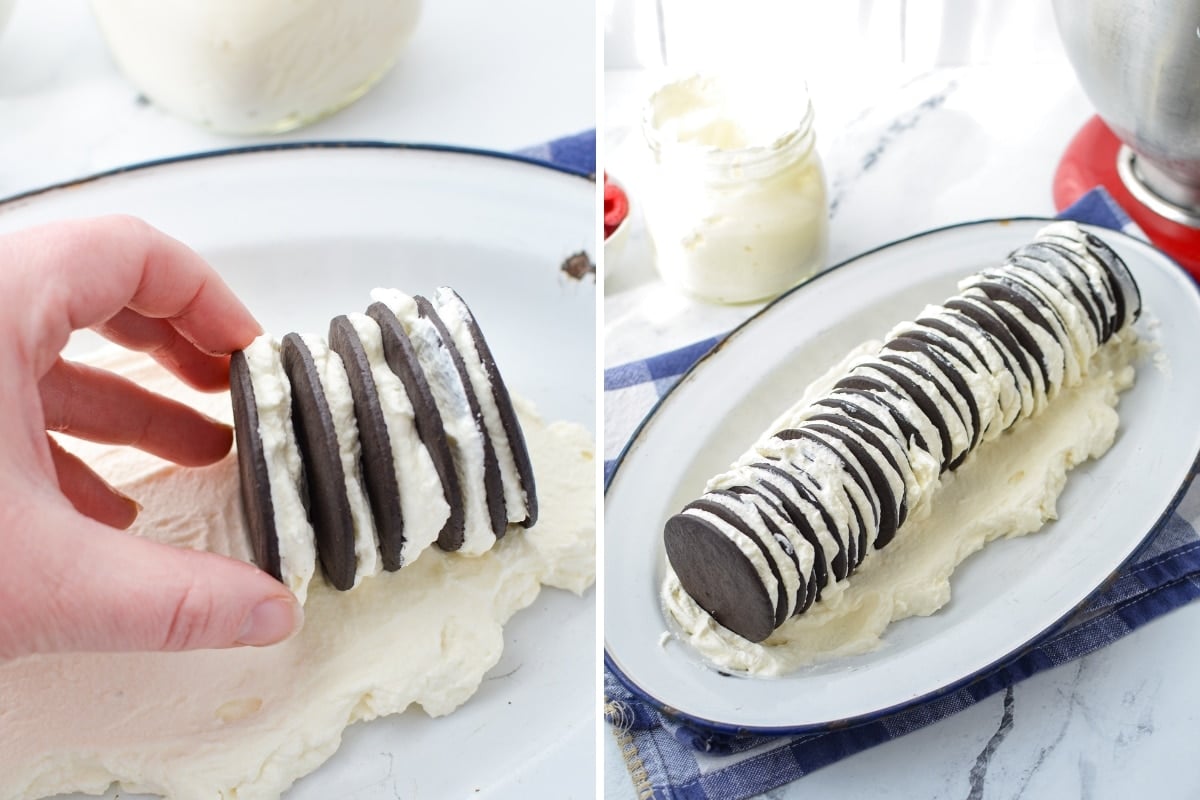
Step four: Spread each of the crisp cookies with whipped cream. Sandwich it with the last cookie in the log, until the platter is filled or the cookies are used up.
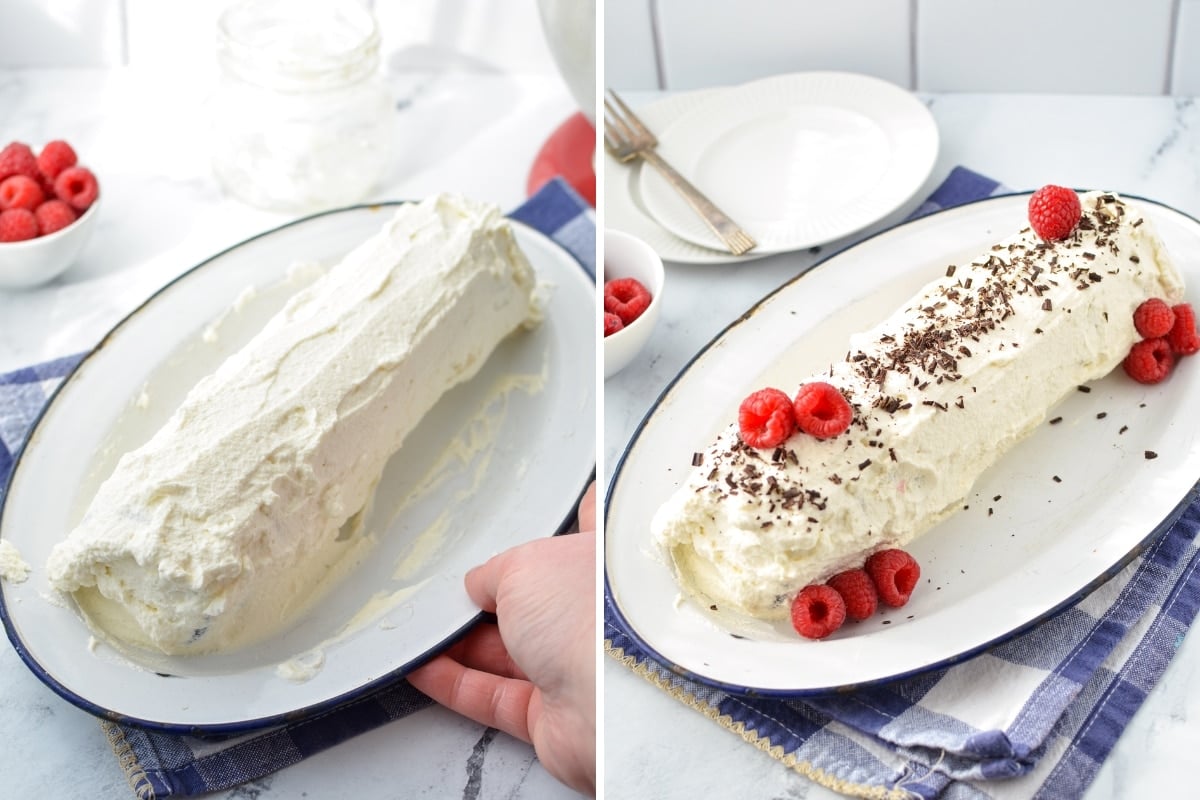
Step five: Top the log of chocolate wafer cookies with the remaining whipped cream, and spread it so it covers the top and all exposed sides.
Chilling
Like all recipes for no bake icebox cake, this Zebra Cake requires some time to chill in the fridge. This is what transforms the firm, black cocoa wafers into a delicious cake-like texture. The whipped cream soaks into the cookies, turning them into something soft, delicious, and perfect for slicing.
- Chill your cake for about 8-12 hours (a little less or a little more will work fine) for the best results.
- I like to make it in the morning to enjoy it with the evening meal.
- If celebrating an afternoon party or birthday, you can prepare it the night before and allow it to chill overnight.
- Wrap it gently in plastic wrap. I like to poke a few toothpicks in the cake so I can drape the plastic wrap. This helps prevent smooshing the whipped cream.
Decorating
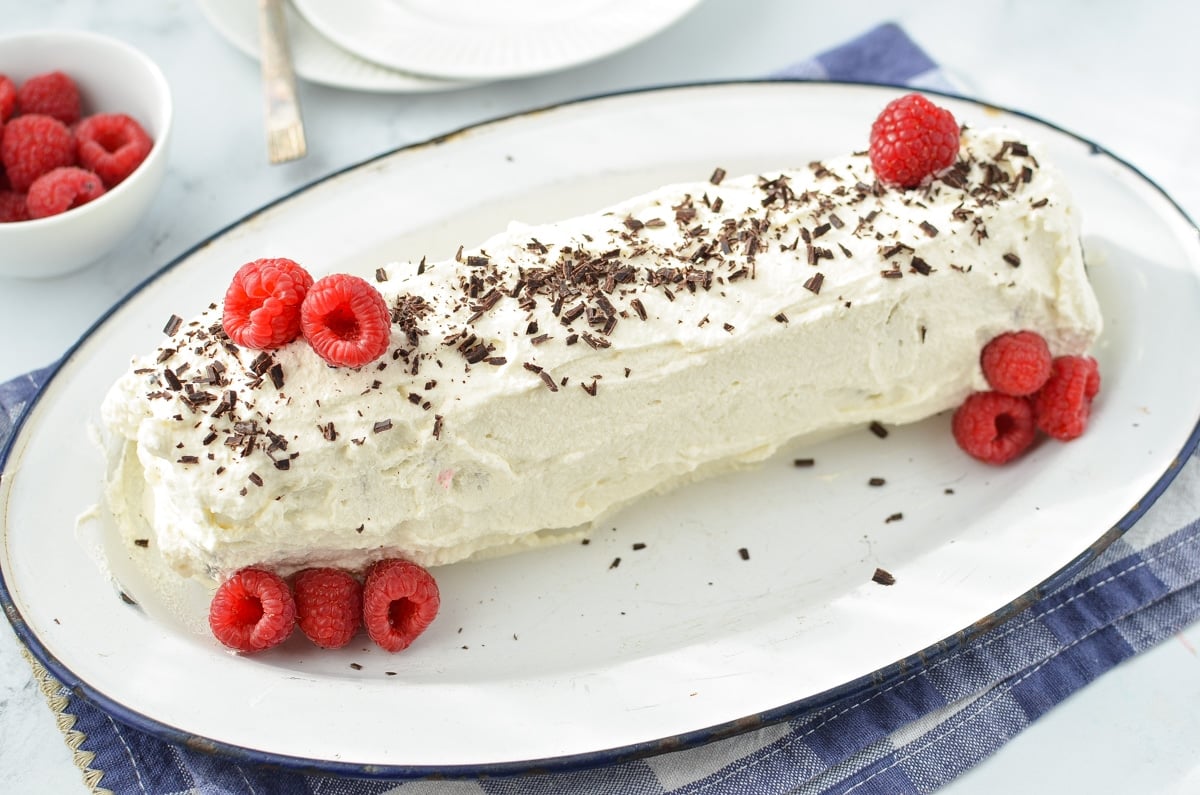
After your chocolate icebox cake has chilled and is ready to serve, you can go ahead and decorate the top of the cake however you like!
Here are a few ideas:
- Chocolate shavings
- Fresh berries (raspberries or strawberries have a nice contrast)
- Mint leaves
- A dusting of cocoa powder
- Mini chocolate chips
- A thin layer of crushed leftover cookies
- Drizzle of chocolate syrup or caramel sauce
HINT: Prepare your decorations and garnish ahead of time. Add the shaved chocolate, berries, etc to a small bowl and store in the fridge until needed.
Slicing and Serving
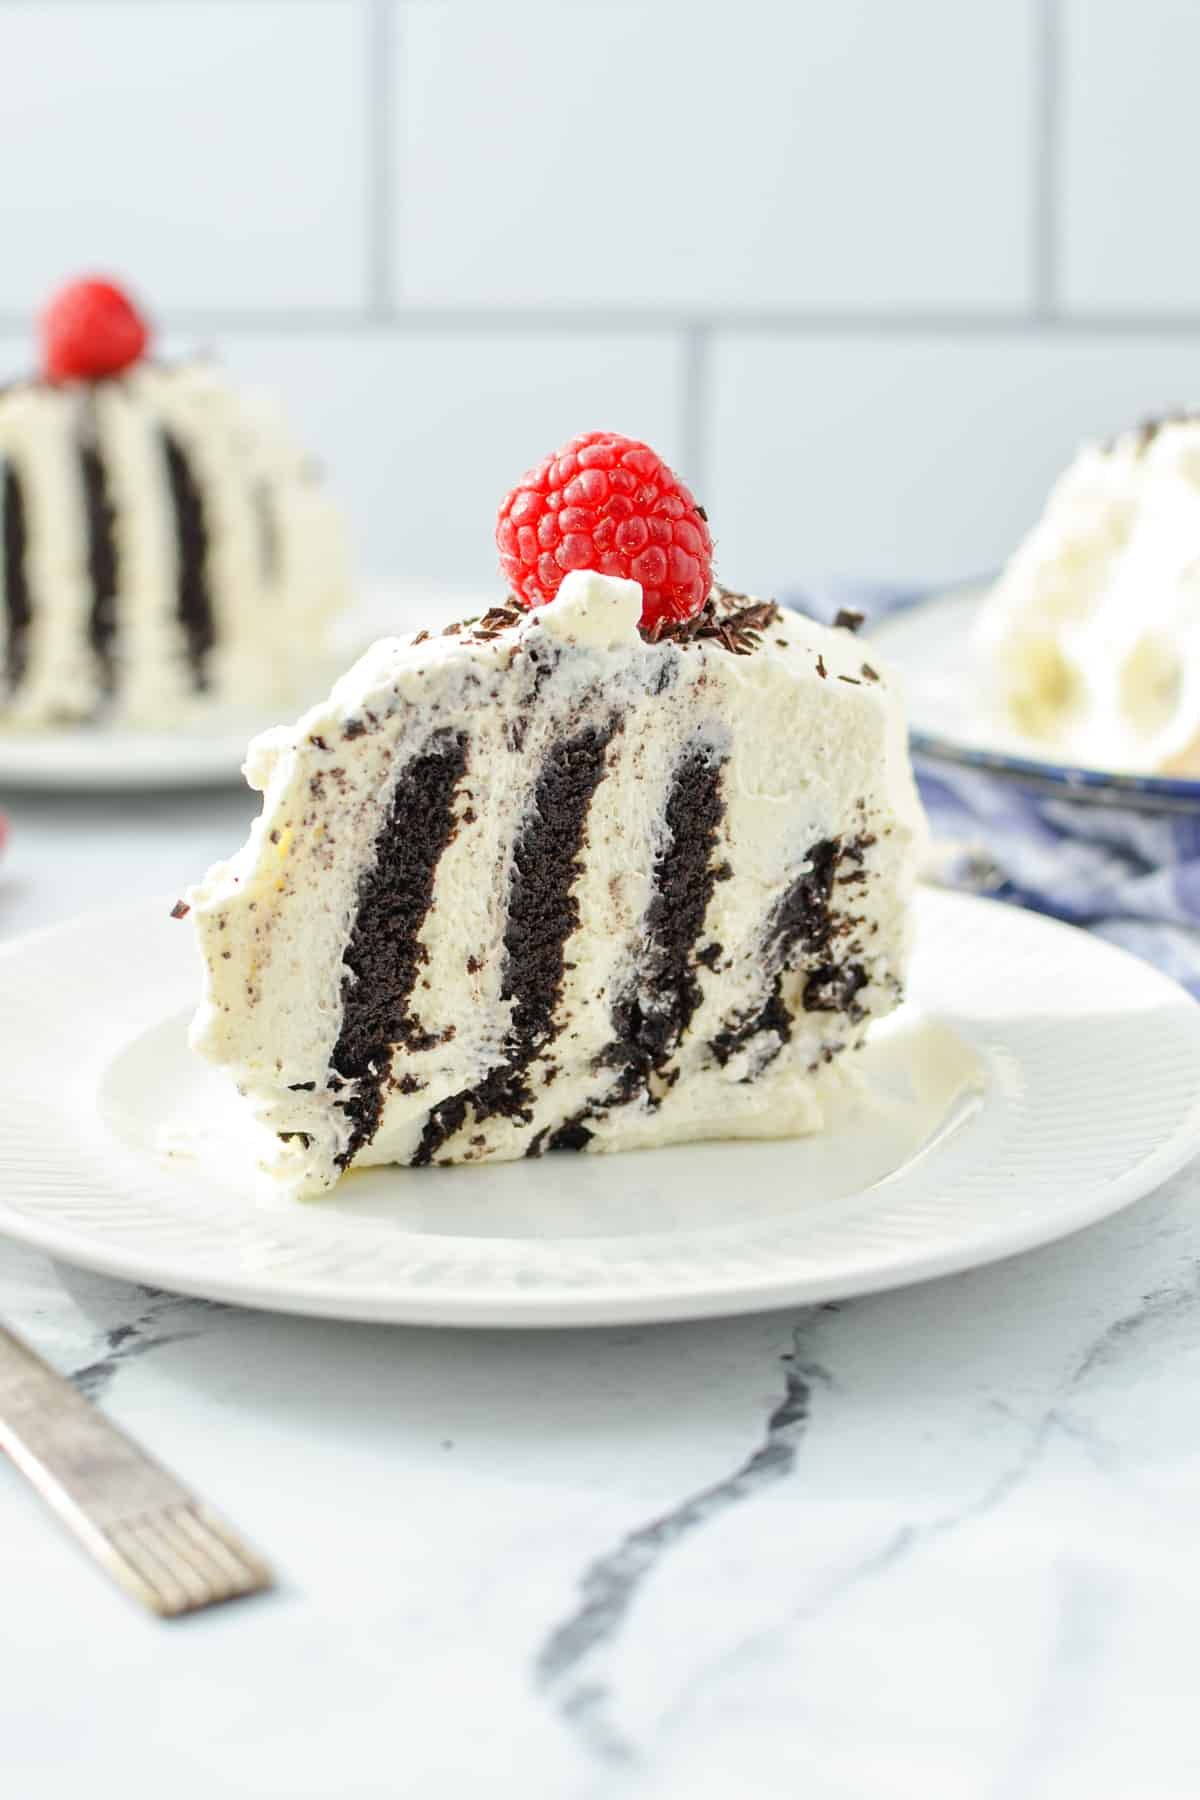
Once your cake is ready to serve, use a sharp knife to cut the cake into slices diagonally.
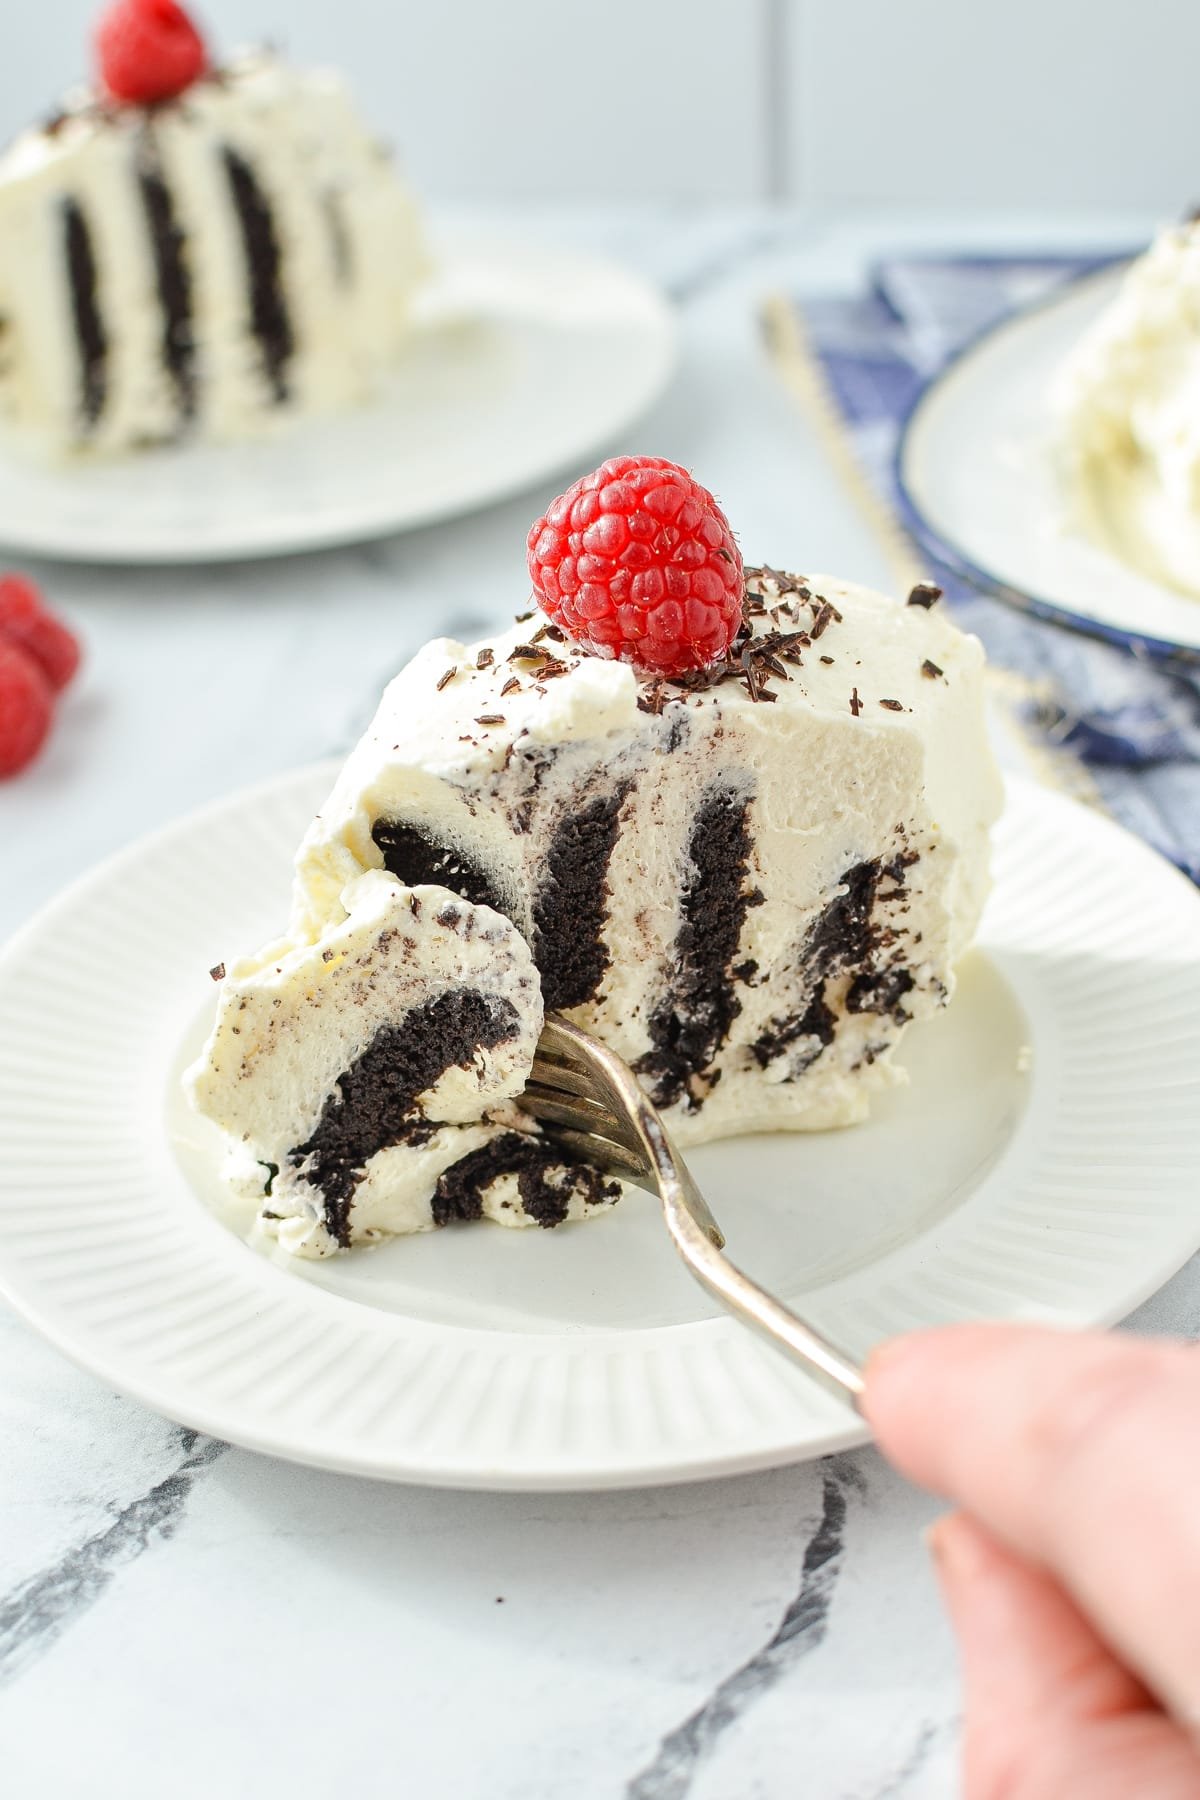
It's really important to slice it diagonally because this is what gives the interior of the cake that beautiful striped pattern (hence the name Zebra cake).
Variations and Substitutions
With Oreo cookies: Substitute the chocolate wafer cookies for Oreo cookies that have been separated, with the centers removed. Layer the whipped cream in an 8X8 baking dish (or springform pan), then add a layer of cookies. Alternate layers of whipped cream and cookie halves, ending with whipped cream.
With graham crackers: Substitute the chocolate wafer cookies for graham crackers. Either maintain a log-style cake or layer it into a baking dish, alternating layers of whipped cream and a single layer of graham crackers.
With Cool Whip: Substitute the whipped cream for an 8oz container of frozen whipped topping. Just make sure to thaw it beforehand!
With Cream Cheese: Soften half of a brick of cream cheese (4oz), and whip it until fluffy. Fold it together with most of an 8oz container of Cool whip. Use in place of the whipped cream in the recipe.
Gluten-free: Make your own Gluten-free chocolate wafer cookies (Gluten Free on a Shoestring has a great recipe) and use those in place of the store-bought ones.
Recipe FAQ's
An icebox references a time when homes did not have refrigerators, but instead, had insulated boxes that were kept cool with ice. Ice blocks would be delivered weekly, and it enabled many homes to keep leftovers, as well as store food needed for the week. Icebox cakes were made by assembling prepared cookies with whipped cream and chilling the "cake" in the icebox. After chilling, the cookies would absorb the moisture from the whipped cream and turn into a cake-like consistency.
Often made from packaged cookies and whipped cream, these early "no bake" cakes were very popular during the Depression and WW2 era when sugar rations made it harder to prepare home-baked goodies. Housewives would buy packaged cookies and biscuits, and layer them with whipped cream to create an easy cake without using any precious sugar rations. Companies at the time would even offer "recipes" on their tins or boxes, encouraging women to buy these previously unpopular items.
More No Bake Desserts
- No Bake Chocolate Chip Cheesecake
- Lazy Cheesecake Salad
- No Bake Nutella Pie
- Berry Cheesecake Salad
- No Bake Peanut Butter Bars
If you loved this recipe for No Bake Chocolate Wafer Icebox Cake, let me know by leaving a 5-star review in the recipe card or comment below! You can also tag me on Instagram @dashfordinner.
Chocolate Wafer Icebox Cake (Zebra Cake)
Equipment
- Stand mixer or electric hand mixer
Ingredients
- 1 package chocolate wafer cookies (9 ounces)
Whipped Cream
- 1 ½ cups heavy whipping cream chilled
- 3 tablespoons powdered sugar
- 1 teaspoon vanilla extract
For Garnish
- Shaved chocolate (optional)
- Fresh raspberries or strawberries (optional)
Instructions
- Add chilled heavy cream to a large bowl or the bowl of a stand mixer, along with the powdered sugar and vanilla extract.
- Using an electric hand mixer or the whisk attachment for a stand mixer, whip the cream and other ingredients on medium-high speed until moderate peaks form, about 3-4 minutes. Stop the mixer and scrape down the sides of the bowl as needed.
- You will know the whipped cream is ready when you can pull the whisk portion out of the whipped cream and it holds its shape for at least 30 seconds before falling.
- Add about ½-1 cup of whipped cream to the center of a serving platter, spreading it down the middle into a 1 ½” wide rectangle.
- Place a heaping spoonful of whipped cream on each chocolate wafer cookie, sandwiching them together in a log on top of the line of whipped cream on the serving tray.
- Spread the remaining whipped cream on top of the line of chocolate wafer cookies, smoothing it out into an even layer so that it covers all of the cookies.
- Wrap it gently with plastic wrap (try not to allow it to touch the cake) and place it in the fridge to chill for 8-12 hours.
- Remove the zebra cake from the refrigerator and garnish it with shaved chocolate and fresh berries.
- Slice the cake diagonally, creating striped pieces (like a Zebra), serve and enjoy.
Notes
Nutrition
Please note that some of my blog posts here at Dash for Dinner may contain affiliate links. If you make a purchase through these links, I will get a small commission at no additional cost to you. Please see my Disclaimer for more information.





Kara P.
This looks delicious! My son and I have been watching the Andy Griffith show and have been so into making all of these old-fashioned recipes we see Aunt Bea make! We recently had a cabinet refinishing done in our kitchen too so everything looks and feels so nice, it has been so fun to cook again. I can't wait to try this out!
MS Landerway
unfortunately chocolate wafers are no longer available in any grocery store. Haven't been made in over 3 years
Dolly {Dash for Dinner}
Yes I have seen they have been discontinued! They were available for a little longer here in Canada but have disappeared recently. I'm hoping they will come back, but in the meantime there are some good homemade versions.