


This easy recipe for Peppermint Truffles is sure to become a holiday favorite! Made with just 5 simple ingredients, this no-bake treat is perfect for gifting - did I mention that they freeze well too?
Don't forget to check out my recipe for Orange Chocolate Truffles - they are just as easy to make as these ones.
Every year, for many years, my husband and I were gifted these amazing peppermint truffles from his Aunt during the holiday season. We looked forward to them every year, and tried to make them last as long as possible.
When I finally got around to asking for the recipe (so I could make them year-round), I was shocked to find out how easy they were to make! With only one caveat - her recipe called for peppermint chocolate chips, which were hard to find even during the holiday season, and impossible during the rest of the year.
So I worked backward from the original recipe, using peppermint extract instead of peppermint-flavored chocolate chips (and a few more tweaks). Now everyone can make them - no matter where they live, and no matter what time of year the craving hits!
We've enjoyed them for more than a decade, and I just know your family (and friends) will too.
Why You'll Love It:
- Just 5 ingredients. Yes, seriously! And 2 of those are extracts.
- Easy to make. This recipe can be made either on the stovetop or in the microwave. If you can melt chocolate, you can make these!
- The perfect gift. If you have people on your list who LOVE sweet treats, make them a batch of these homemade peppermint truffles. Pack them into a decorative cookie tin and you're good to go!
You Will Need:

- Chocolate chips: I recommend using semi-sweet chocolate chips for this recipe. If you use Nestle Tollhouse you might want to check on the chocolate during the chilling process - I find it hardens more quickly than others!
- Sweetened condensed milk: The secret ingredient for no-fuss truffles! This is sold in the baking aisle and is not to be confused with "evaporated milk."
- Peppermint extract: This can be a bit tricky to find, but most large grocery chains will have it. If you can't find peppermint, a general "mint" extract will work perfectly fine!
- Vanilla extract: Enhances the peppermint flavor.
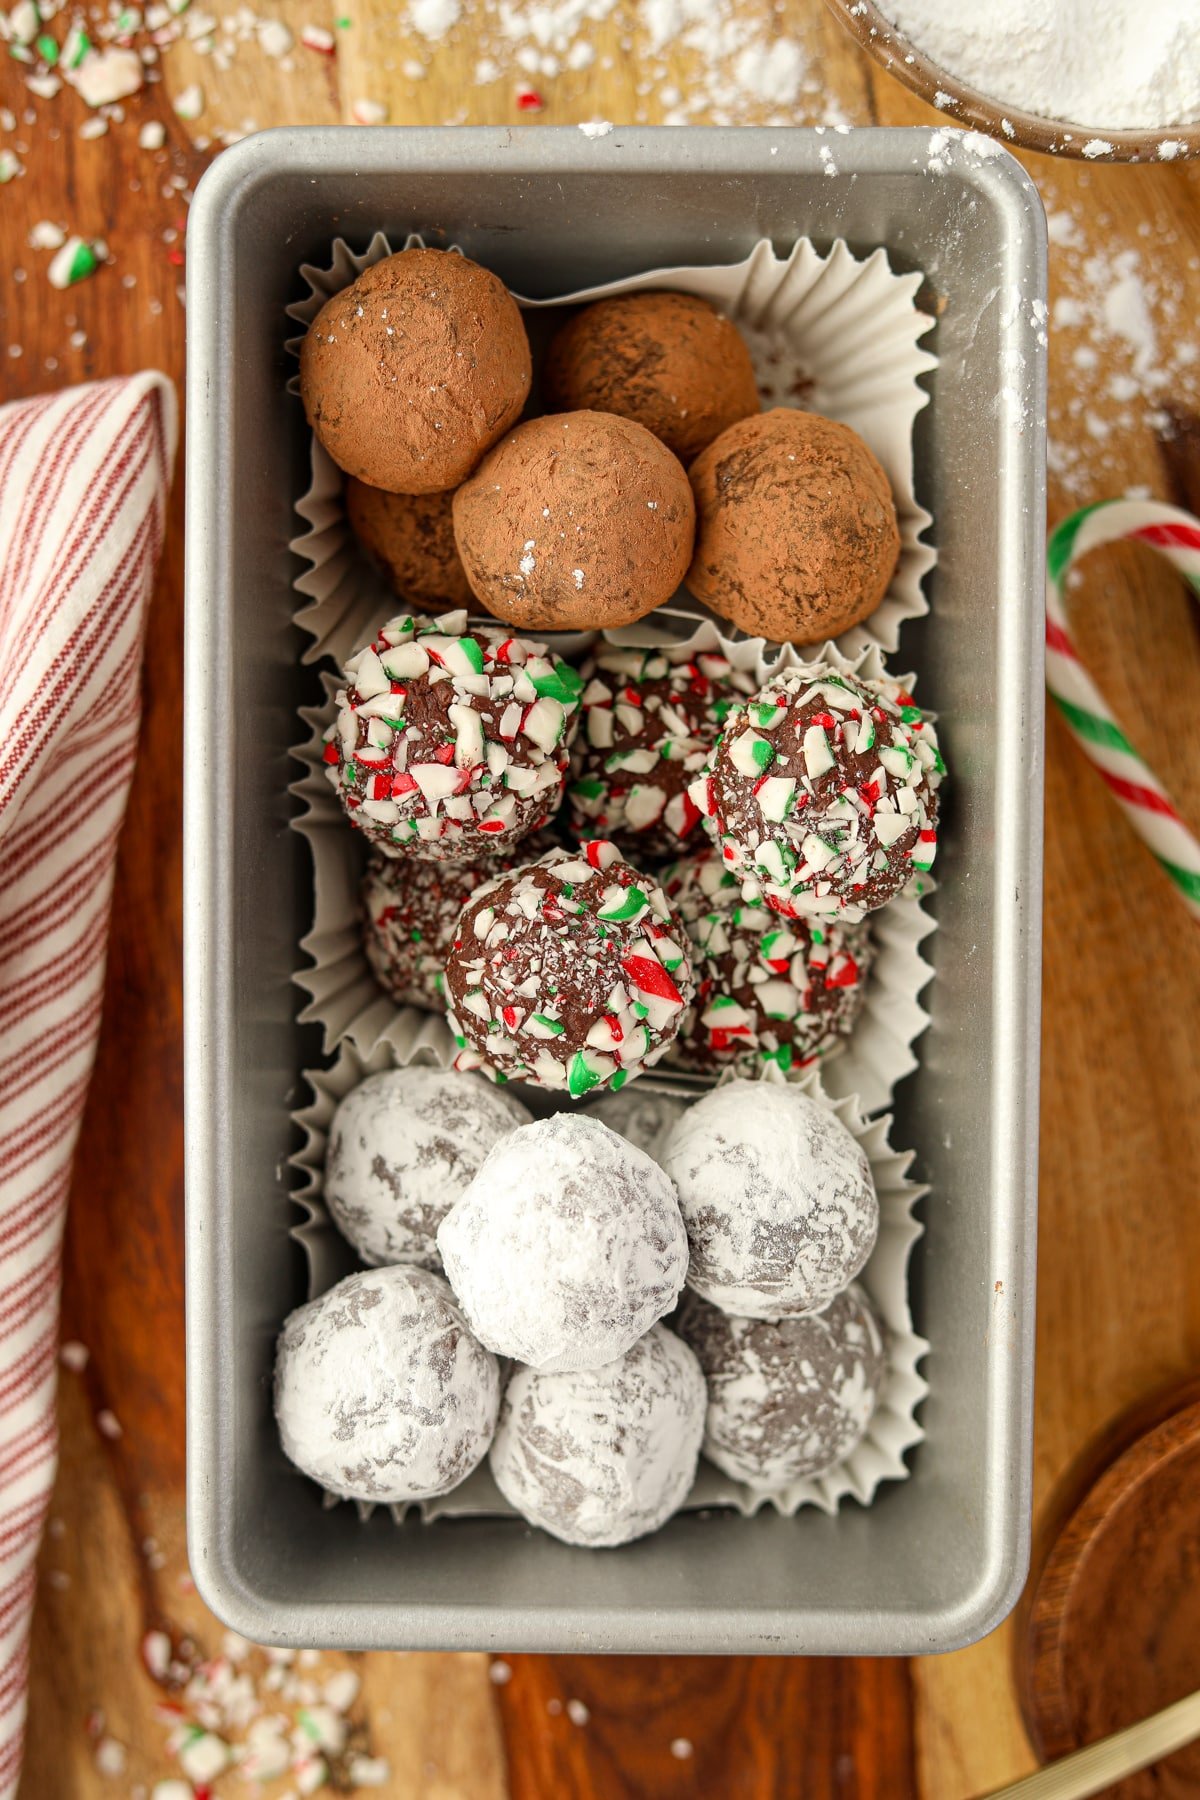
- Powdered sugar (for rolling): I like to use a variety of coatings for a pretty presentation. While powdered sugar is my favorite, cocoa powder, crushed candy canes, or melted candy melts (for a hard coating) are some other great options.
Recommended Equipment
- Cookie scoop (or heaping tablespoon)
- Baking sheet
- Shallow bowl (or rimmed tray; for rolling)
How to Make (Easy) Peppermint Truffles
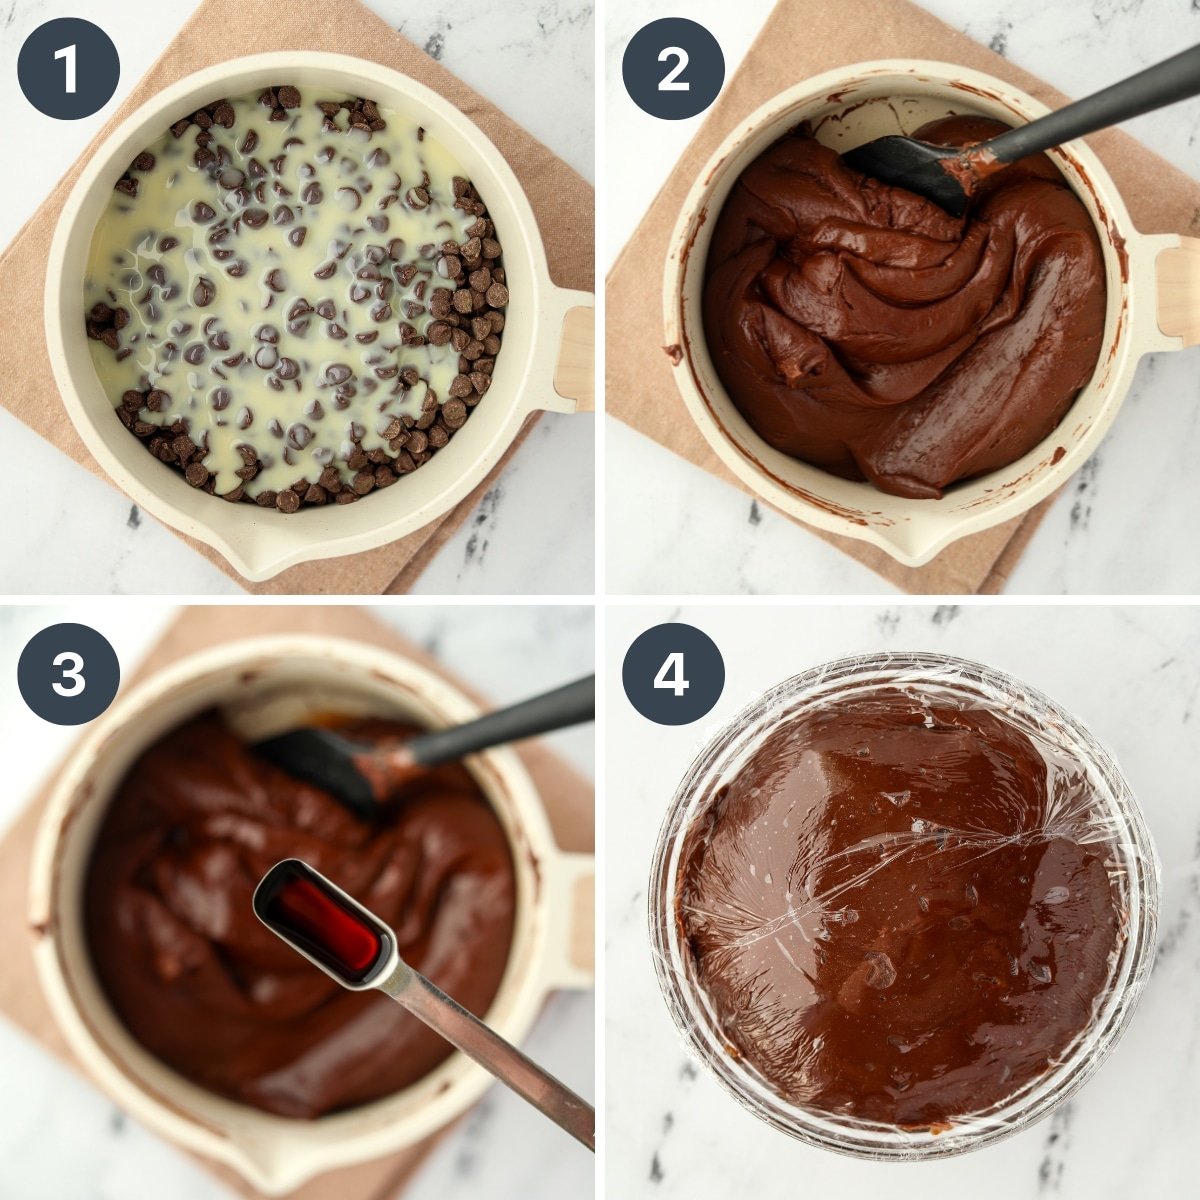
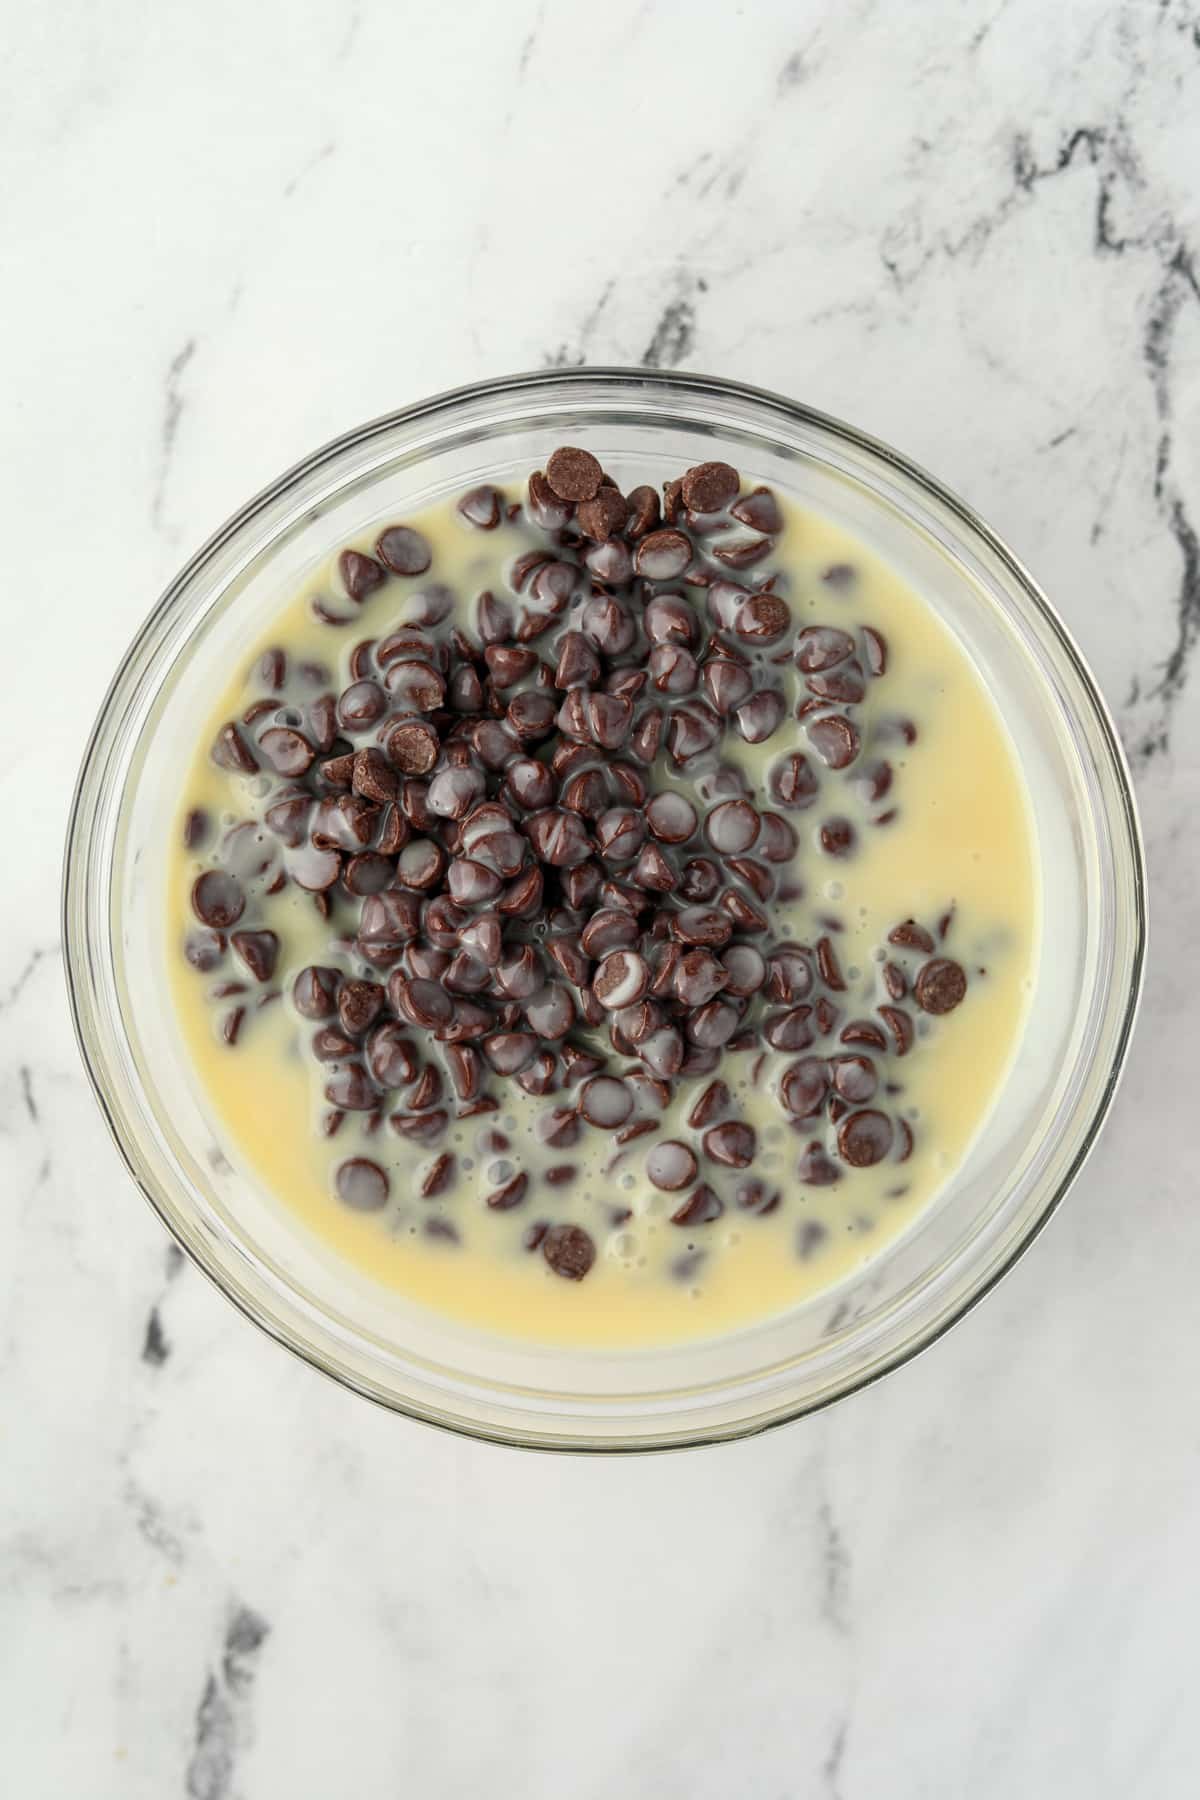
- Add 3 cups of chocolate chips and a full can of sweetened condensed milk to a medium saucepan.
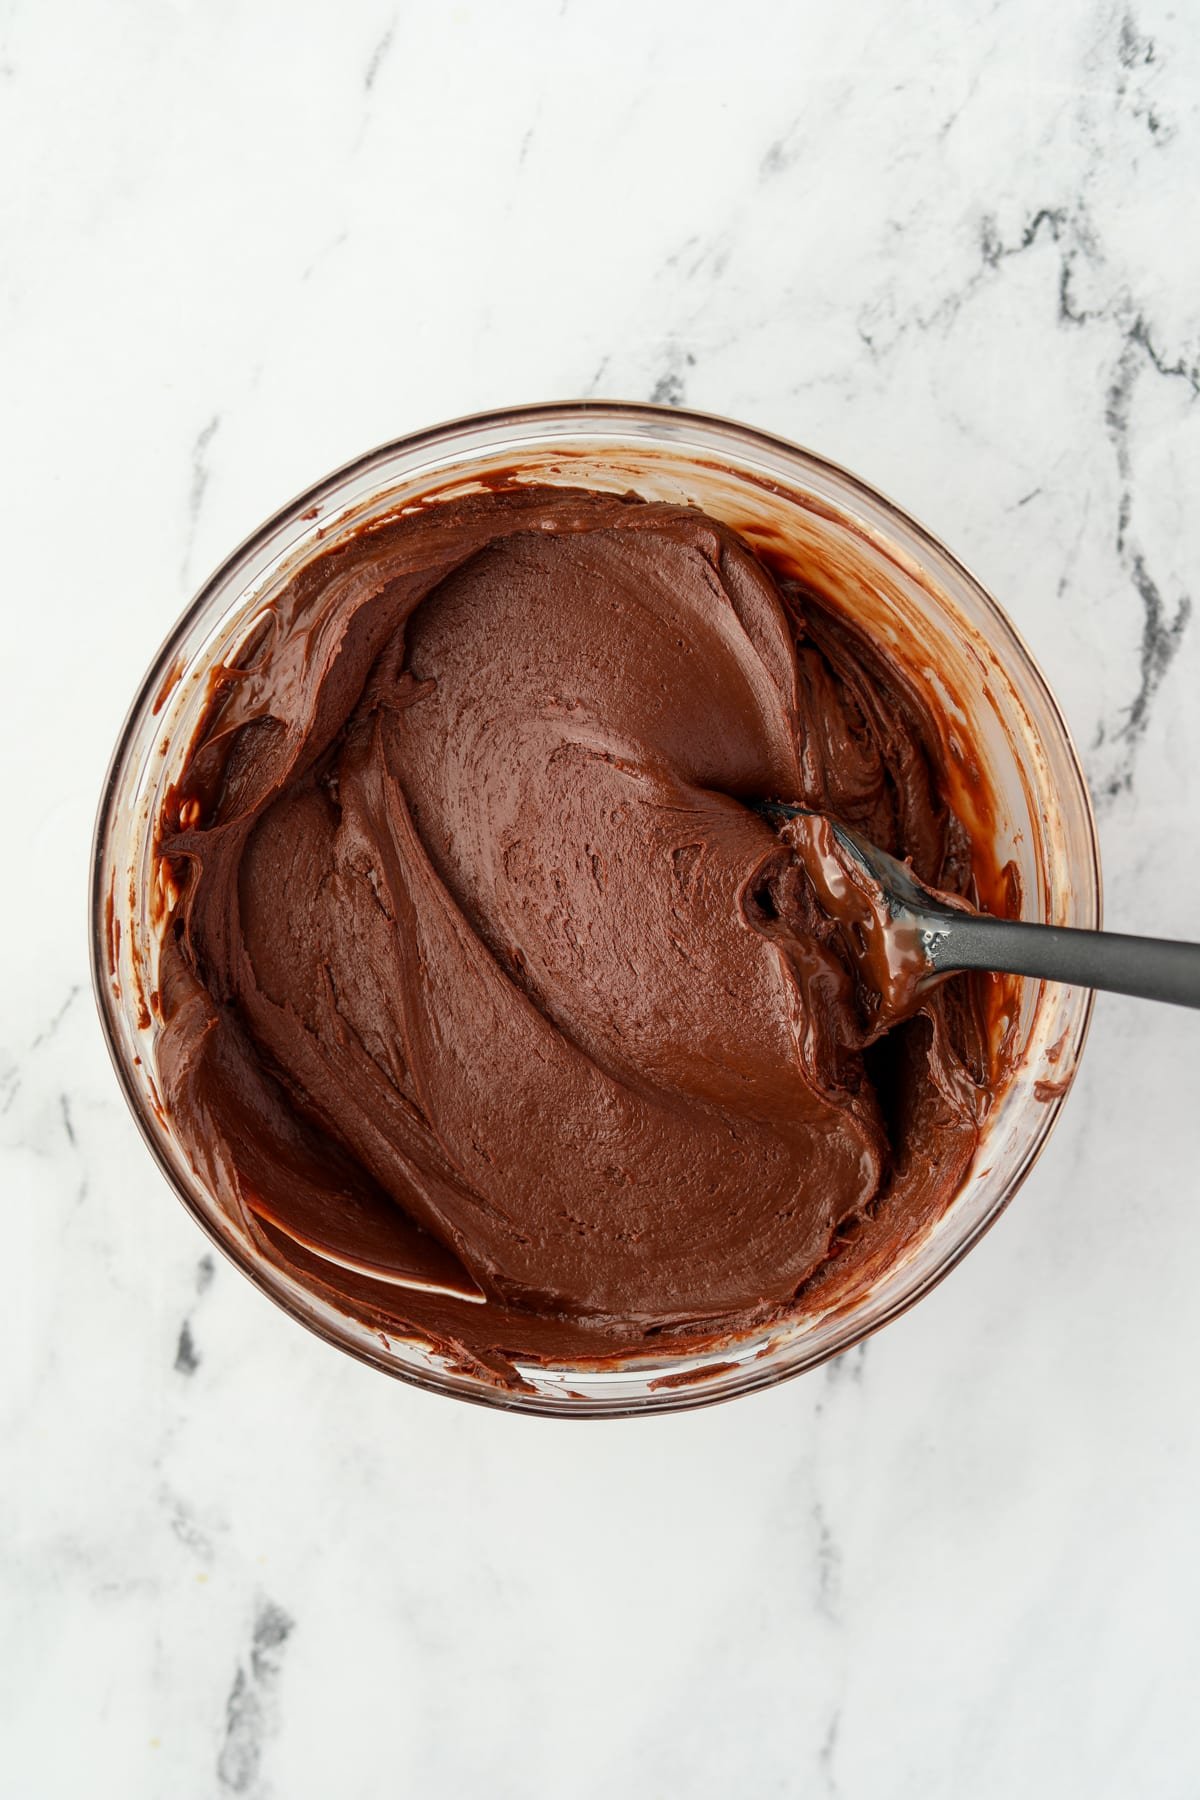
- Heat over low heat, stirring often, until the chocolate mixture melts into a smooth, uniform consistency.
- Remove from the heat and stir in 1 tablespoon of peppermint extract and 1 teaspoon of vanilla extract.
- Transfer the truffle mixture to a medium heatproof bowl and wrap it tightly with plastic wrap.
Top tip: Press the plastic wrap against the surface of the chocolate; this will prevent it from forming a discolored "skin" as it cools.
Chill for Two Hours
Once the bowl is well wrapped, transfer it to the refrigerator to chill for about 2 hours, or until the chocolate is firm, yet scoopable.
The Microwave Method
If you prefer, you can even make these easy truffles in the microwave! Although if I'm being honest, I don't totally love this method. It's easier to accidentally overheat the chocolate, which causes it to "seize" and become hard.
That being said, if you choose this method, just be sure to use short intervals and stir well in between heating sessions.
- Add the chocolate chips and sweetened condensed milk to microwave-safe large bowl. Stir well.
- Heat the chocolate in the microwave in 30 second intervals, stirring the chocolate to encourage melting after each turn.
- After 3-4 intervals the chocolate should melt into a smooth consistency after stirring. Once it does, add in 1 tablespoon of peppermint extract and 1 teaspoon of vanilla extract; stir well.
- Chill, portion, and shape the chocolate as outlined in the main recipe.
Shaping and Rolling the Truffles
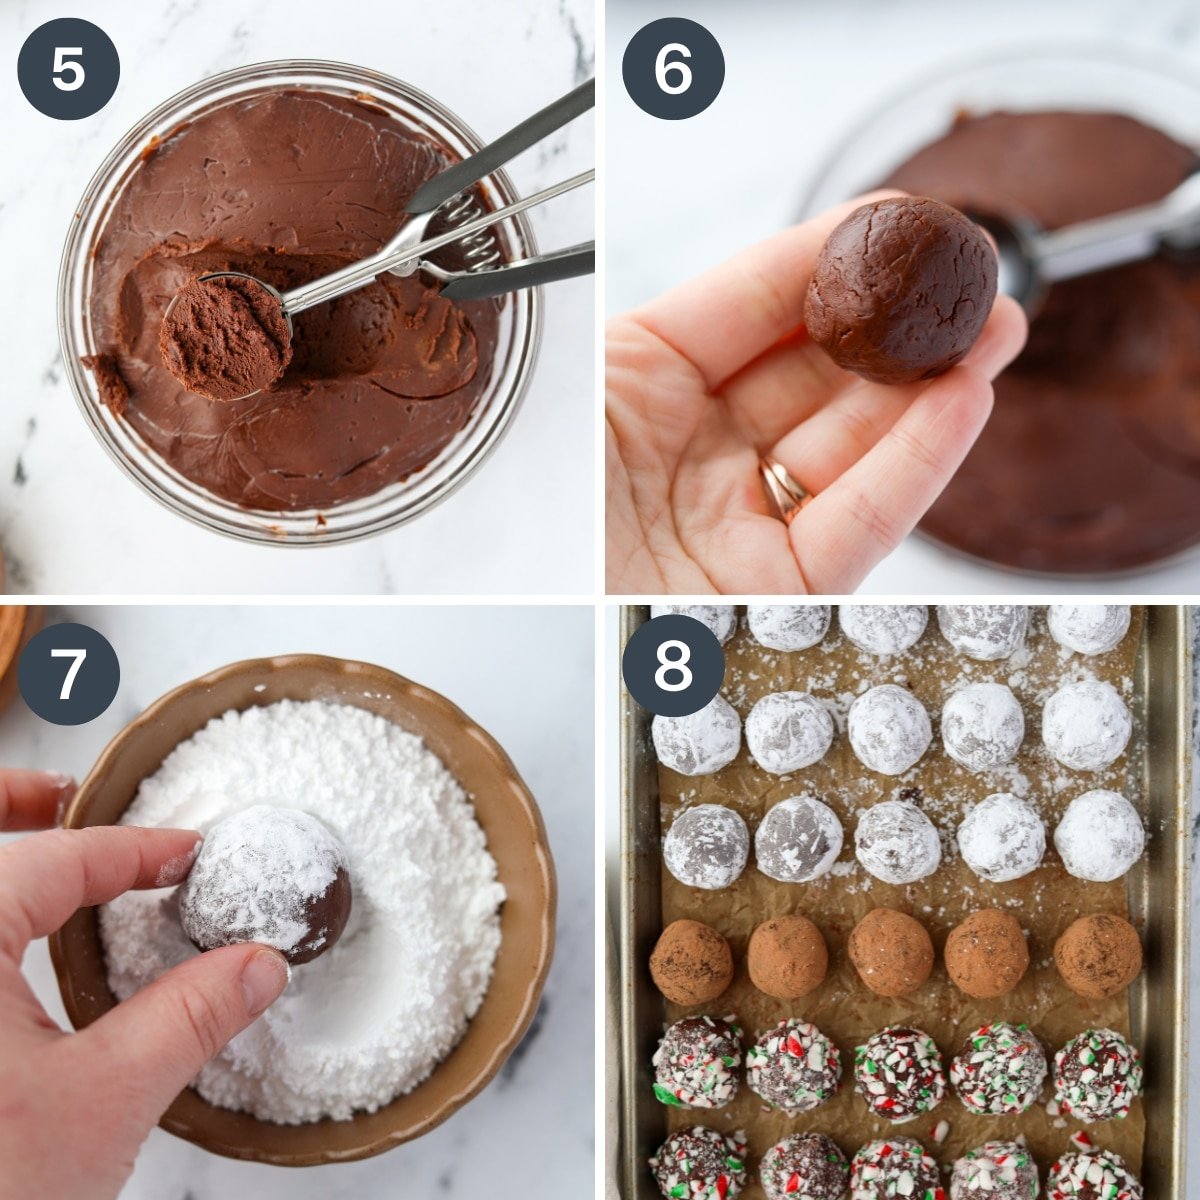
- After the chocolate has chilled for about two hours it should be firm, but still fairly easy to scoop with a cookie scoop (or standard tablespoon).
Note: Scoop the chocolate using a #40 cookie scoop (1 ½-2 tablespoons), or a heaping tablespoon. - Roll each chocolate portion between your palms to form a smooth, round ball.
- Add powdered sugar (or other coating options; see below) to a shallow bowl and drop the rolled truffles in, tossing them around until well coated.
- Place the finished peppermint truffles on a parchment-lined tray, in a cookie tin (or container). Repeat with the remaining truffles until all of the chocolate has been used up.
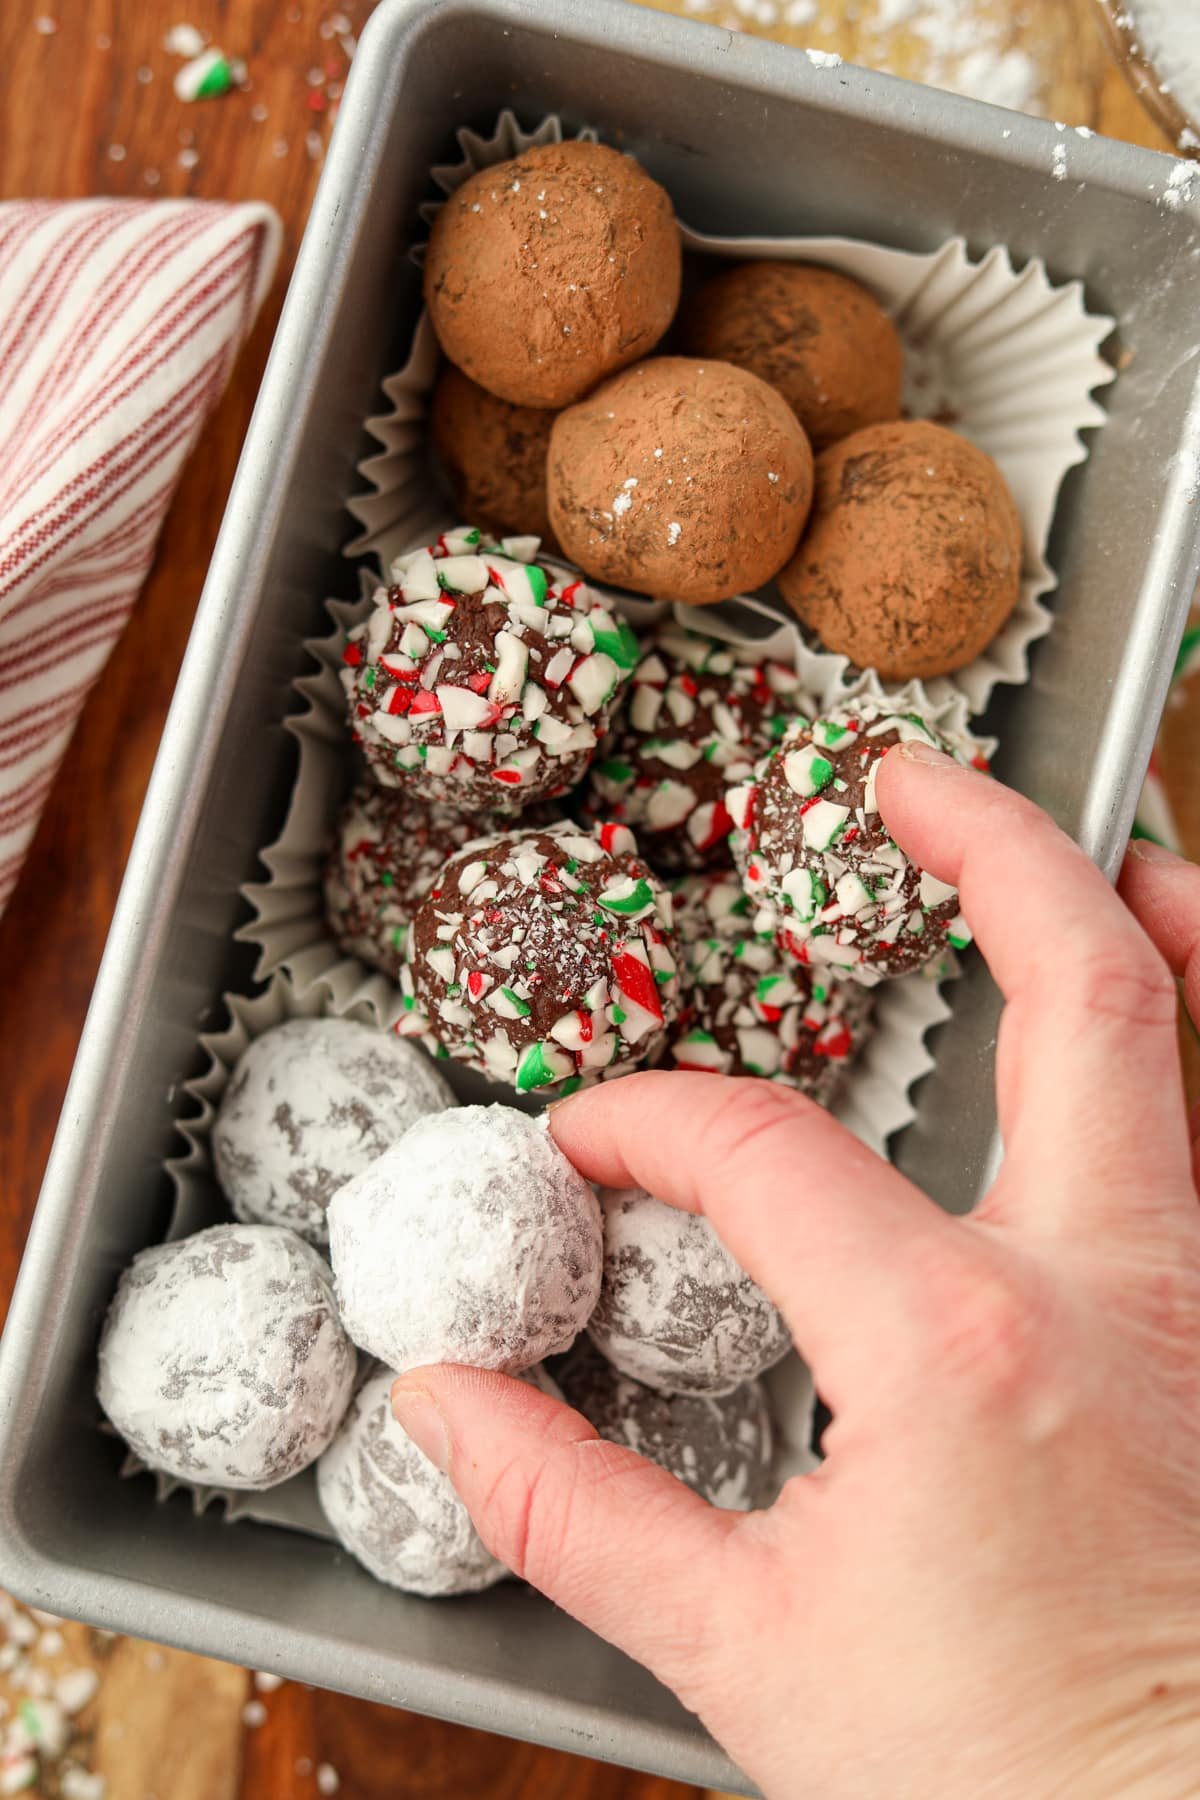
Options for Rolling and Garnishing
There are so many options! My preference is powdered sugar, but my husband loves crushed candy canes. For gifting I like to do a variety of coatings, which makes for a nice presentation in a decorative tin or jar.
- Powdered sugar (AKA confectioners or icing sugar)
- Cocoa powder
- Crushed candy canes
- Crushed peppermint candies
- Candy melts (green, white, or your preferred color)
- Melted chocolate coating (use a chocolate bark or chocolate flavored candy melts)
Variation: Candy Cane Truffles
For an extra festive touch you can garnish your peppermint truffles with crushed candy canes (or crushed peppermint candies).
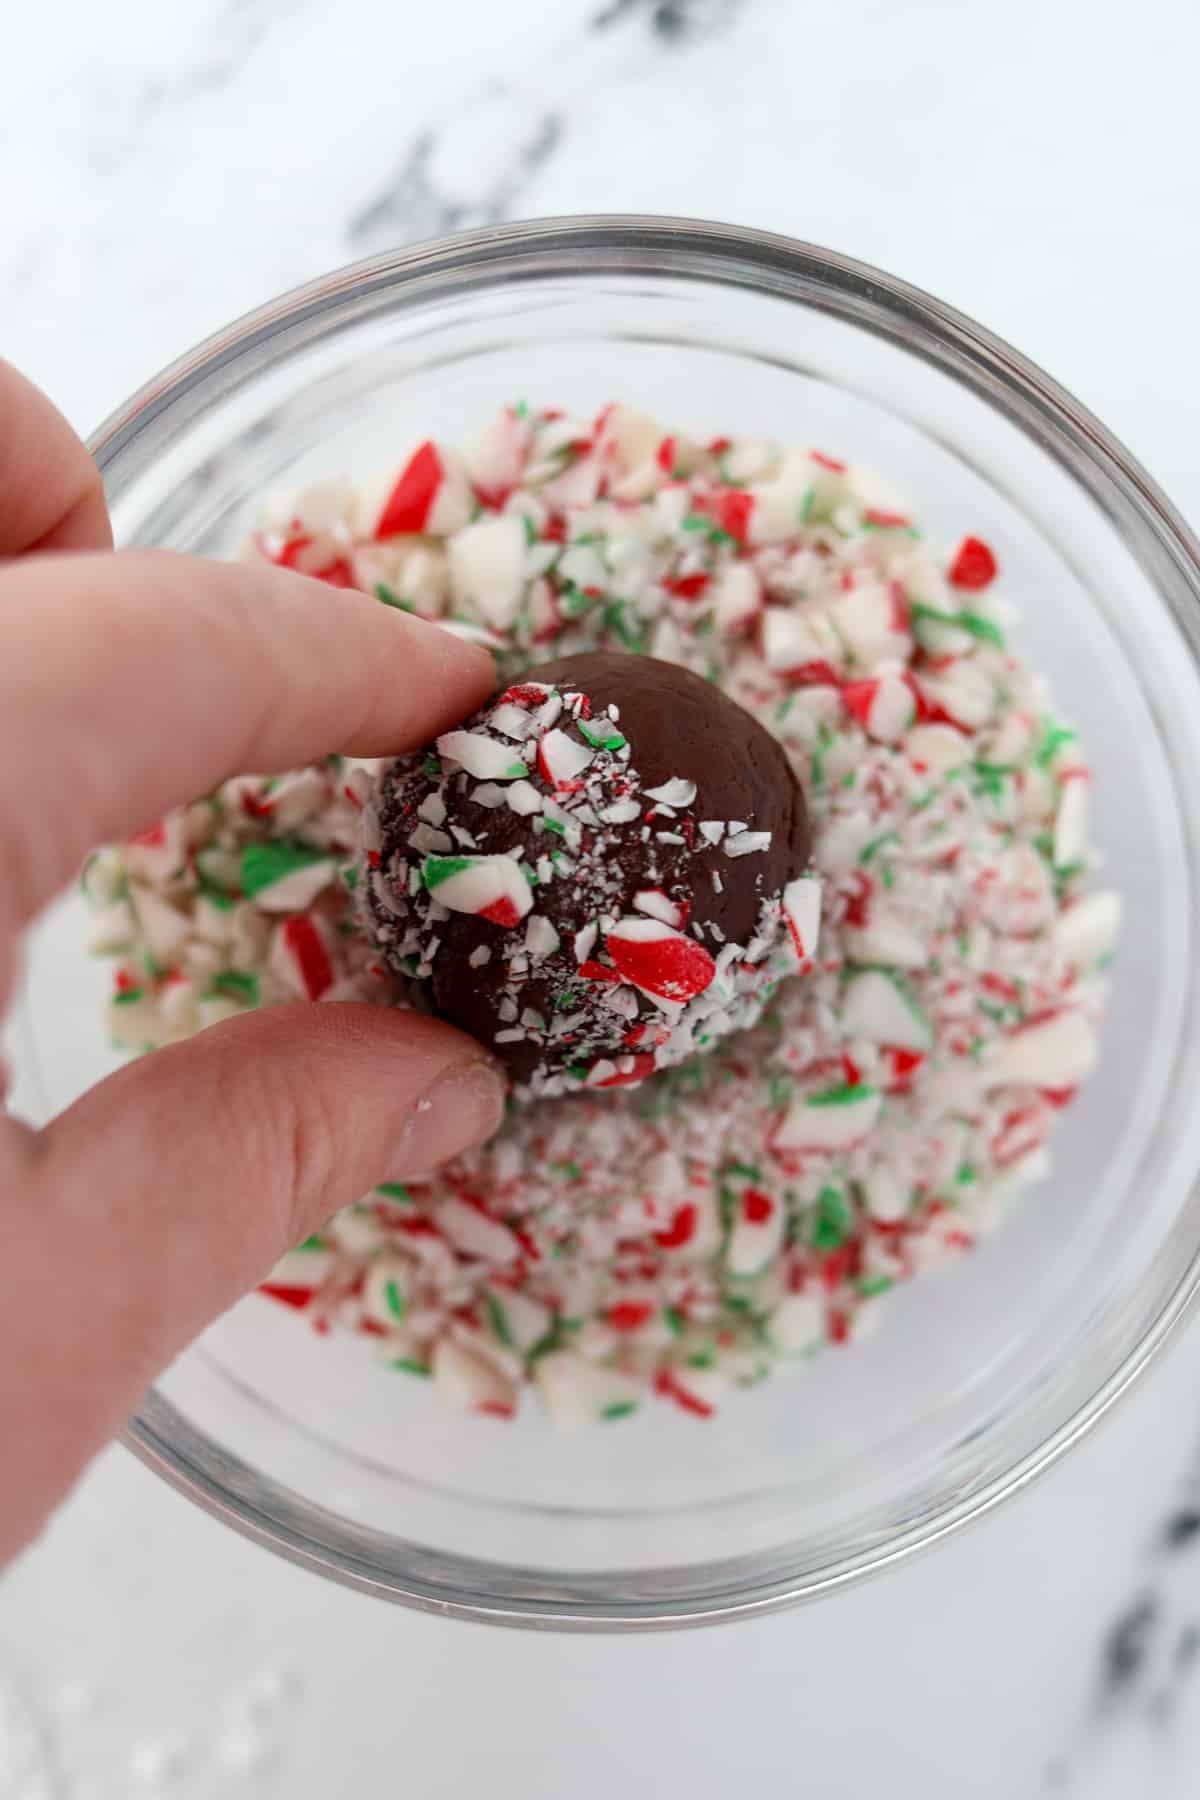
- Add 5-6 candy canes to a heavy duty zippered freezer bag OR a food processor. Use a rolling pin or meat tenderizer to crush the candy canes (or use the pulse function if using a food processor).
- Roll the formed chocolate balls in the crushed candy, pressing it in gently with your fingers if needed.
- Transfer to a parchment-lined cookie tin or baking tray. Repeat until all of the truffles are coated.
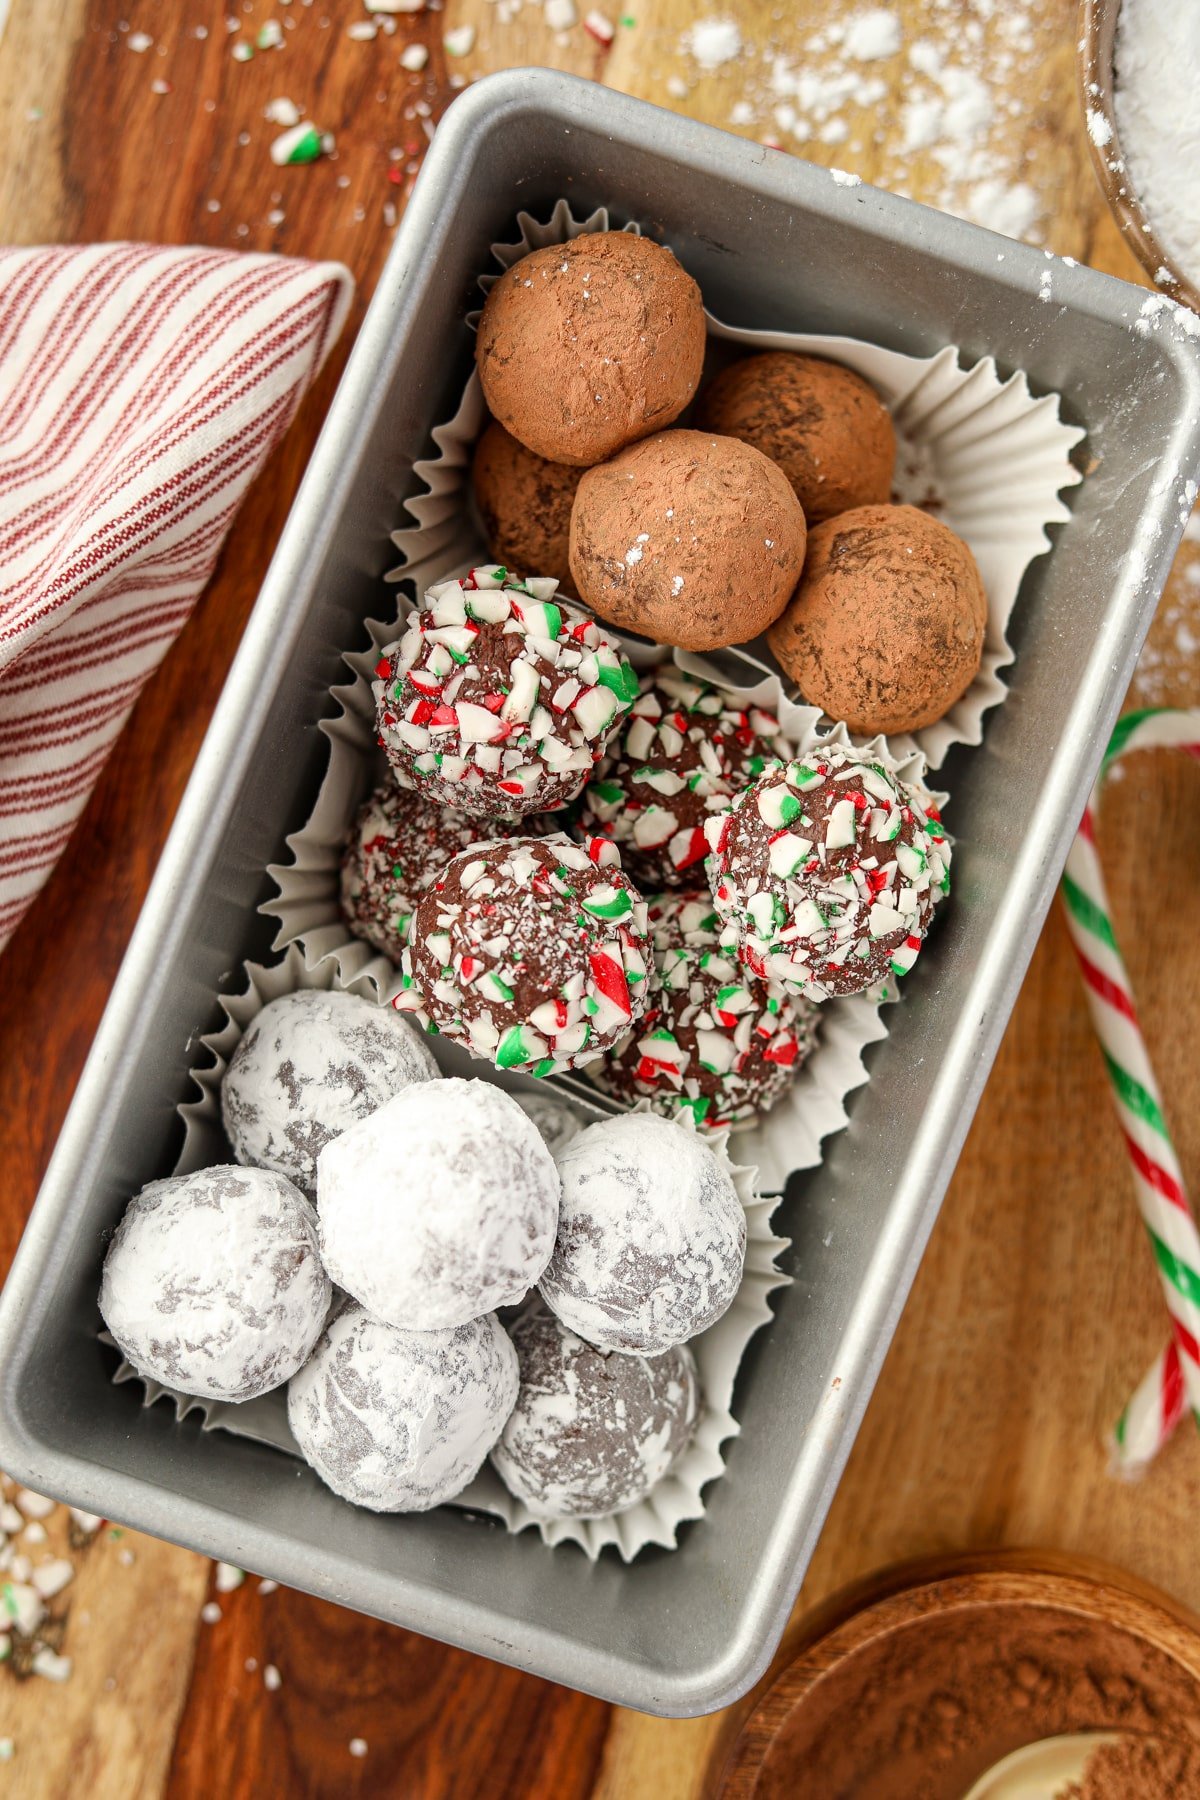
Storing Homemade Truffles
Place your peppermint truffles in a parchment-lined cookie tin (or airtight container). Store in the refrigerator for up to 2 weeks. If desired, you can even freeze them! They last for a good 2-3 months as long as they are in an airtight freezer container or tightly sealed bag.
Keep chilled: It's important to keep your truffles refrigerated in between servings. If they are left at room temperature for too long they become very soft and lose their shape. They also won't last as long (or taste as good), so be sure to keep them chilly to firm up between serving.
Tips and Tricks for Gifting:
- Prepare a variety of flavors and a variety of coatings for a beautiful presentation.
- Gift them in a decorative cookie tin or box.
- Line the box with festive parchment paper or wax paper.
- Make several large batches to divide between several recipients.
- Prepare ahead of the holiday season and store in the freezer until needed (just store them in an airtight freezer container or vacuum sealed bag).
- Include a recipe card and instructions to keep the truffles refrigerated in between serving.

Substitutions
Other flavors: Swap the peppermint for other extract flavors! I've tried many, and most of the time they are absolutely delicious! Chocolate orange truffles are a favorite, but raspberry, coconut, and cherry are all tasty options too.
Dairy-free: Swap the sweetened condensed milk for sweetened condensed coconut milk, and use your favorite dairy-free chocolate chips.
Chocolate chips: You can use semi-sweet, good-quality milk chocolate chips, or even dark chocolate chips to make this recipe. I haven't tried white chocolate yet, but I do think it would work if you melted it very carefully along with 1 teaspoon of coconut oil.
Expert Tips
- Overheating chocolate. It's really important to heat your chocolate carefully and slowly. If you overheat the chocolate, it will "seize" and become hard. At that point, it's pretty difficult to fix it - so go slow and low, and you should be good. If you're nervous, you could use a double boiler.
- Don't chill for TOO long. I have made the mistake of forgetting about the chocolate in the refrigerator. If you go over 2-2 ½ hours the chocolate may be too hard. You can either soften it at room temperature for 2-4 hours or rewarm it (in a saucepan) and start the chilling process over again.
- Stovetop is the best method. I've tested both the stovetop and the microwave method, and the stovetop wins for me. Things can go South quickly when you're using the intense heat of the microwave, so when it comes to making chocolate truffles - I recommend doing so on the stovetop if you can.
If you loved this easy recipe for peppermint truffles, let me know by leaving a 5-star review in the recipe card or comment below! You can also tag me on Instagram @dashfordinner.

Easy Peppermint Truffles (5 Ingredients!)
Equipment
- #40 cookie scoop or heaping tablespoon
Ingredients
- 3 cups chocolate chips semi-sweet
- 1 14oz can sweetened condensed milk
- 1 tablespoon peppermint extract
- 1 teaspoon vanilla extract
For rolling:
- Powdered sugar cocoa powder, crushed candy canes, candy melts, etc.
Instructions
- To a medium saucepan, add the chocolate chips and a full can of sweetened condensed milk. Stir well.
- Warm over low heat (or just a little bit higher than low), melting the chocolate chips and sweetened condensed milk together until smooth and uniform.
- Once the chocolate is melted and smooth, remove the saucepan from the heat and add in the peppermint and vanilla extracts. Fold in gently until well incorporated.
- Transfer the truffle mixture to a medium bowl and wrap tightly with plastic wrap, pressing the plastic down against the surface of the chocolate, forming a seal. This will prevent a "skin" from forming on the top layer as it cools.
- Place the bowl in the refrigerator and chill for approximately 2 hours, or until the chocolate is firm, yet scoopable.
- Once the chocolate is set, remove it from the refrigerator and use a #40 cookie scoop (1 ½ - 2 tablespoons) or a heaping tablespoon to form balls of chocolate.
- Roll each portion between your palms until it makes a smooth, round ball.
- Add powdered sugar (and/or cocoa powder, crushed candy canes, etc.) to a shallow bowl (or tray).
- Drop each chocolate ball into the powdered sugar, tossing it with your hands until it is well coated.
- Once the truffles are coated, place them on a parchment-lined tray, cookie tin, or container.
- Repeat until all of the chocolate has been shaped and rolled in the coating(s) of your choice.
- Keep the truffles refrigerated until they are ready to serve. They should be served chilled, and kept refrigerated; this will help them hold their shape and texture, and they will store longer too!
Notes
Variations:
- Orange chocolate truffles: Use 1 tablespoon of orange extract instead of the peppermint extract.
- Raspberry chocolate truffles: Substitute the peppermint extract for 1 tablespoon of raspberry extract (or bakery emulsion).
- Chocolate coconut truffles: Substitute the peppermint extract for 2 teaspoons of coconut extract. Roll in shredded toasted coconut.
Nutrition
Please note that some of my blog posts here at Dash for Dinner may contain affiliate links. If you make a purchase through these links, I will get a small commission at no additional cost to you. Please see my Disclaimer for more information.


Leave a Reply