


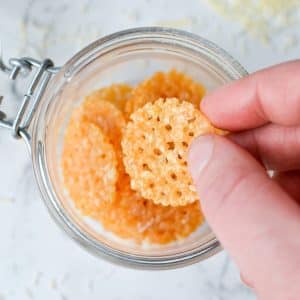
This easy Parmesan Crisps recipe are the perfect snack for satisfying your salty and savory cravings! Made with just 1 ingredient and ready in less than 10 minutes, these crunchy and cheesy crisps will quickly become a family favorite.
Made with natural ingredients, low carb, keto, and gluten-free.
Jump to:
Years ago I started picking up bags of the most delicious and crispy parmesan cheese crisps. They were SO good, and best of all? They had just 1 ingredient! I was sold.
Over time, I started to wonder if I could make my own at home for cheaper. The answer? Yes, absolutely yes! But not just cheaper - better too. Because of the cost savings of making something on my own, I could use an authentic parmigiano reggiano and get twice the flavor for half the cost.
But the absolute best of all? Now you can make it too. After multiple test rounds, I'm proud to bring to you this easy recipe for homemade parmesan crisps. I just know you're going to love it as much as we do.
Reasons to Love This Recipe
- One ingredient. All you need is parmesan cheese!
- Low-carb snack. Whether you're on a keto diet, or are just looking for an easy gluten-free snack, these parmesan crisps are perfect for you.
- Versatile. These work just as well for a midnight treat as they do being featured on a charcuterie board.
- Cheaper. The store-bought version is super tasty, but you can't beat the price savings that comes from making them at home.
What You Need
Ingredients
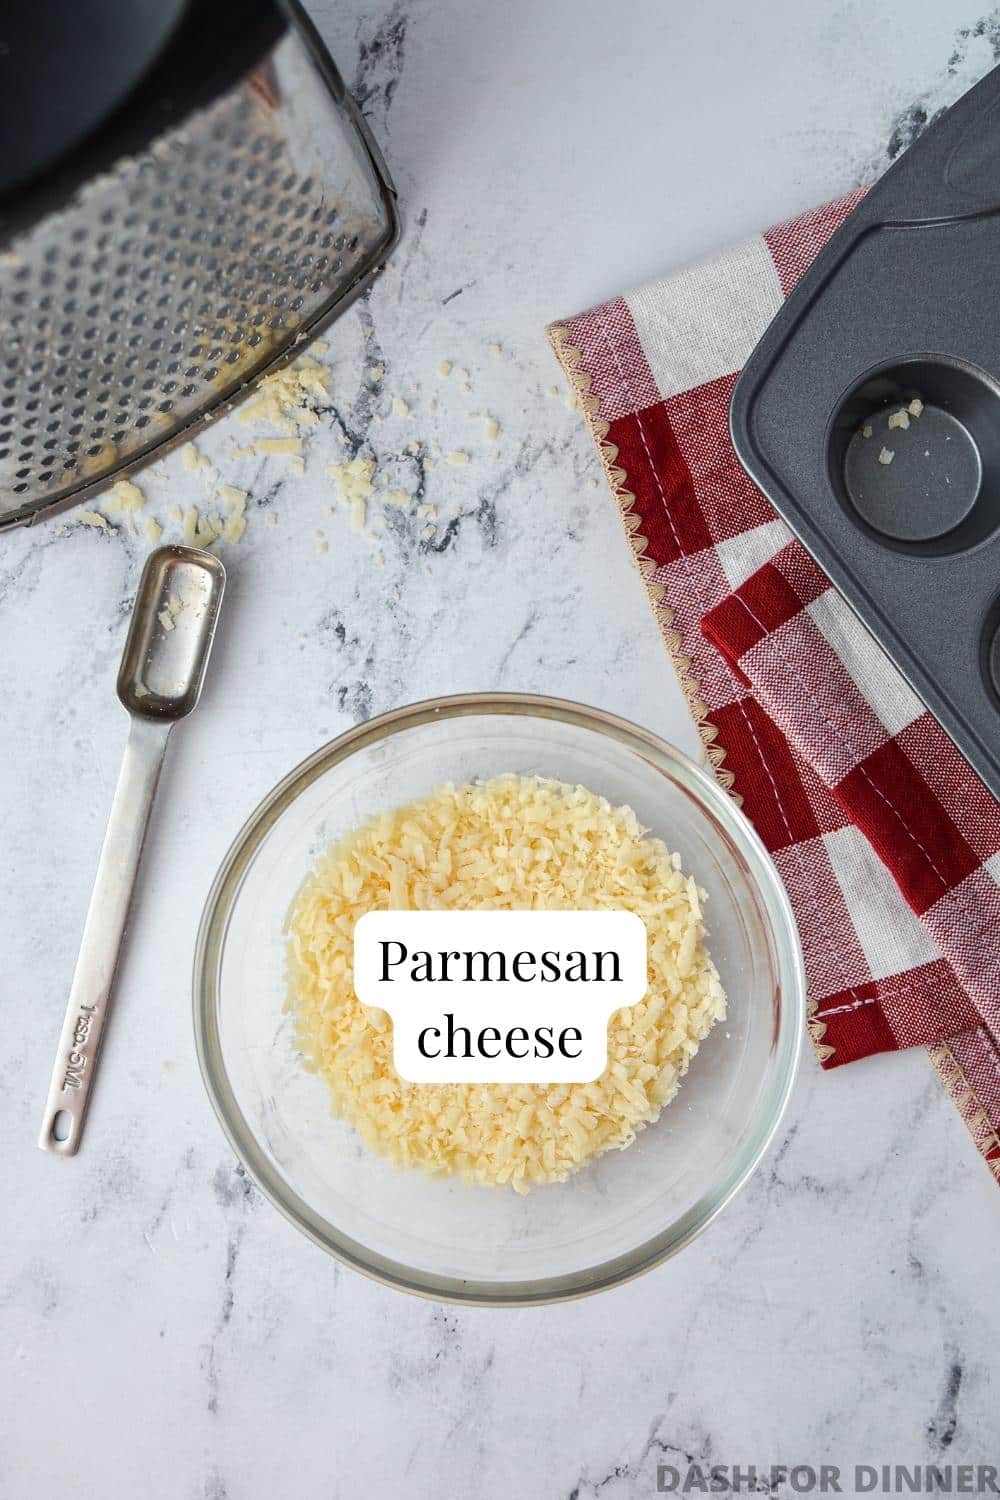
- Parmesan cheese: I've tested this recipe with pre-grated cheese, the shelf-stable type, and freshly grated Parmigiano Reggiano (the good stuff!). While pre-shredded cheese was okay, the shelf-stable stuff did not work at all (and didn't taste great).
- The best option was freshly grated aged parmesan cheese using the small holes on a box grater.
Equipment
- 24-hole mini muffin tin: OR a smaller mini muffin tin while working in batches. This gives a perfectly round shape.
- OR a rimmed baking sheet: If you don't have a mini muffin tin you can use a rimmed baking sheet instead - just mound the cheese, leaving about 1-2" of space in between each mound.
Instructions
It's so easy to make crispy parmesan chips using just cheese and a mini muffin pan or a prepared baking sheet. You're going to want to make these again and again!
Preparation
- Step one: Before you get started, make sure to preheat the oven to 400ºF (about 204ºC) and set aside either your mini muffin tin or rimmed baking sheet.
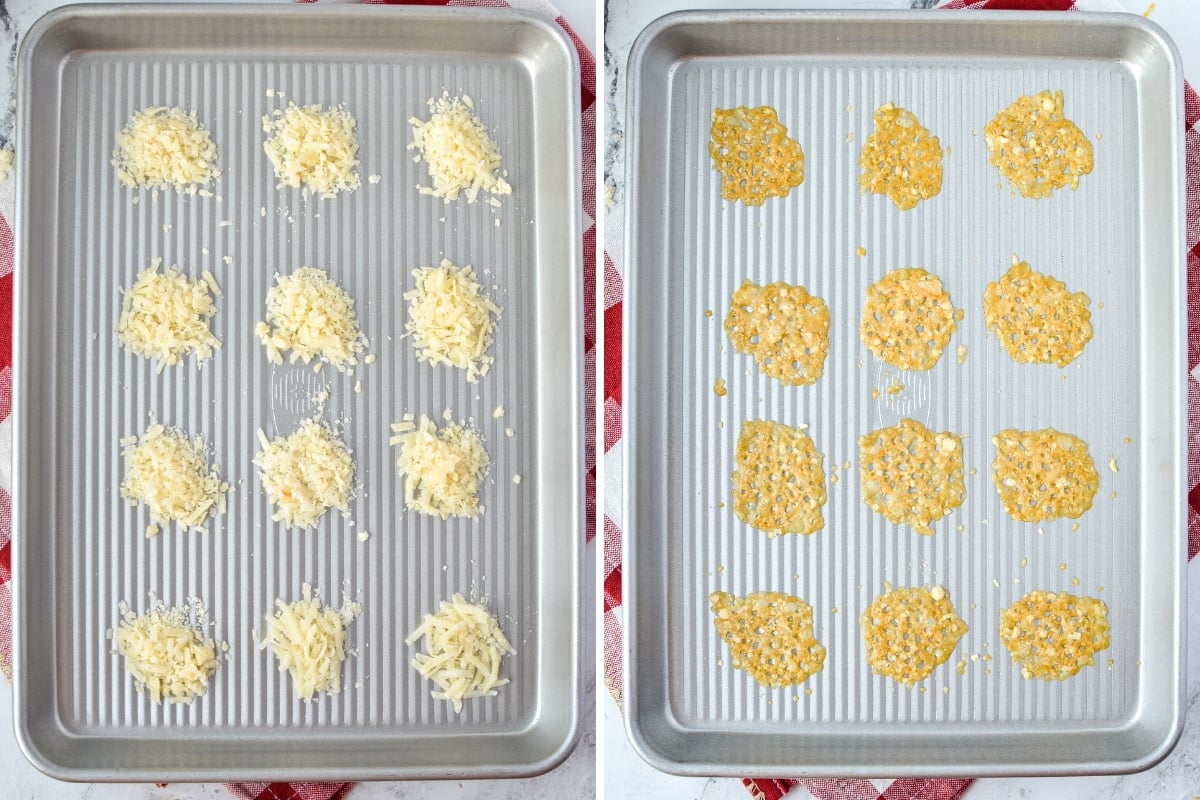
- Step two: Finely shred your parmesan cheese using the small holes of your box grater until you have about ½ cup (which makes about 24 parmesan crisps).
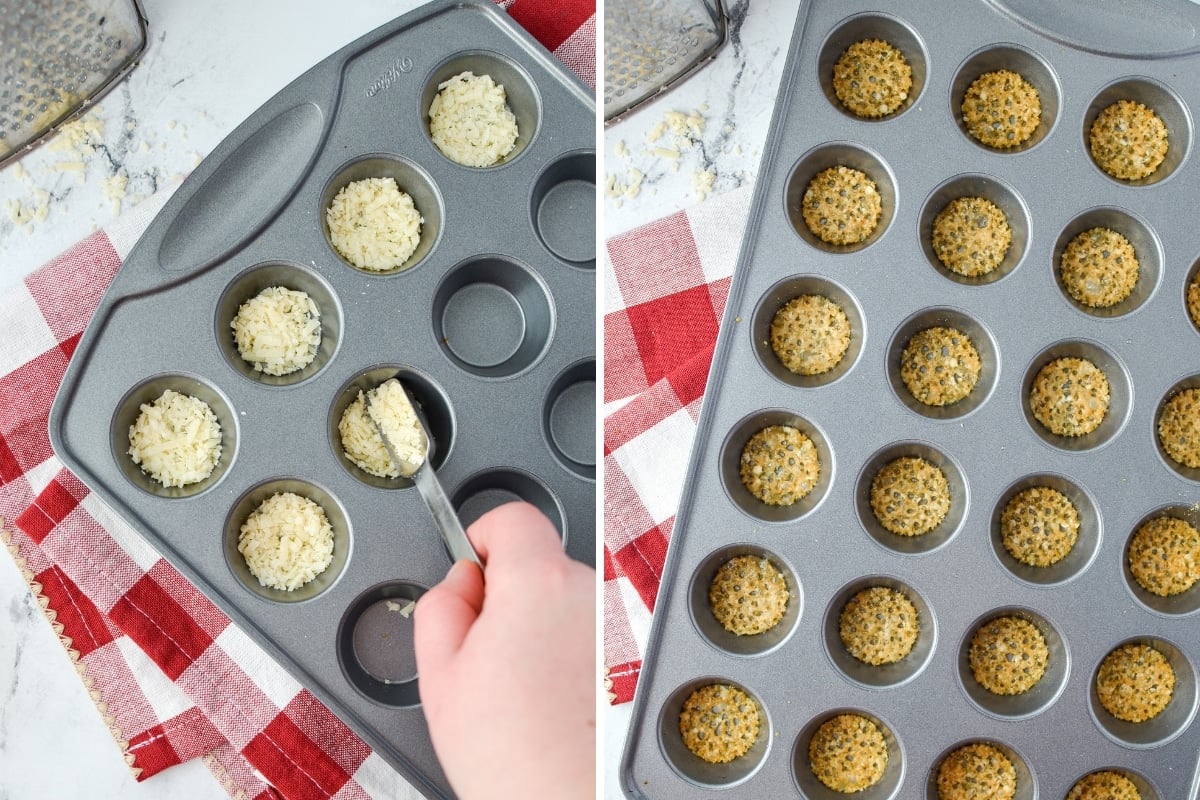
Step three: Measure 1 teaspoon of the shredded parmesan cheese and place it into a single mini-muffin cup, spreading it out evenly with the back of the spoon.
Repeat until all of the muffin cups are filled.
Step four: Bake in the preheated oven for 4-6 minutes, or until the cheese is well melted, bubbly, and the edges have begun to brown.
5 minutes was the sweet spot during multiple recipe tests.
Step five: Remove the mini-muffin tin from the oven and allow for it to cool for about 5-10 minutes, or until the parmesan is no longer pliable and beginning to become crispy.
Draining on paper towels
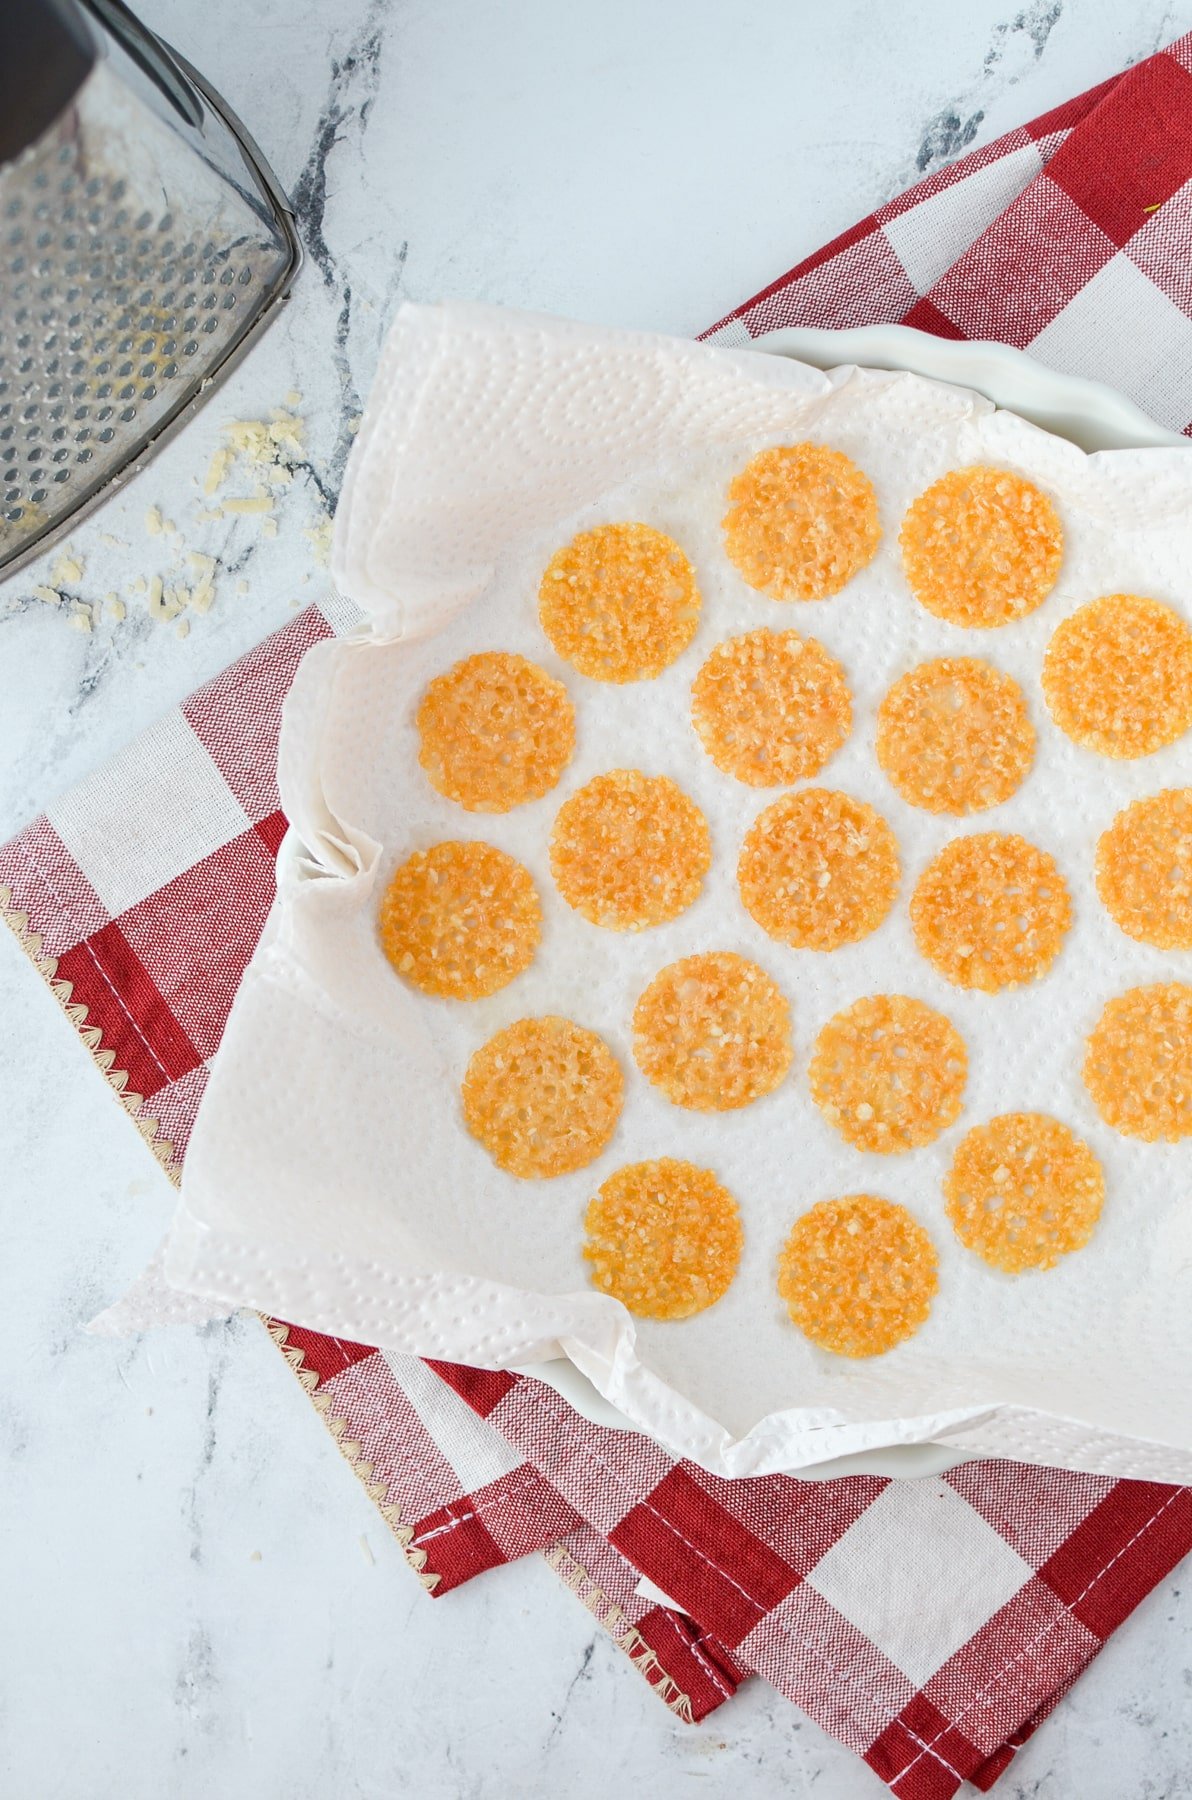
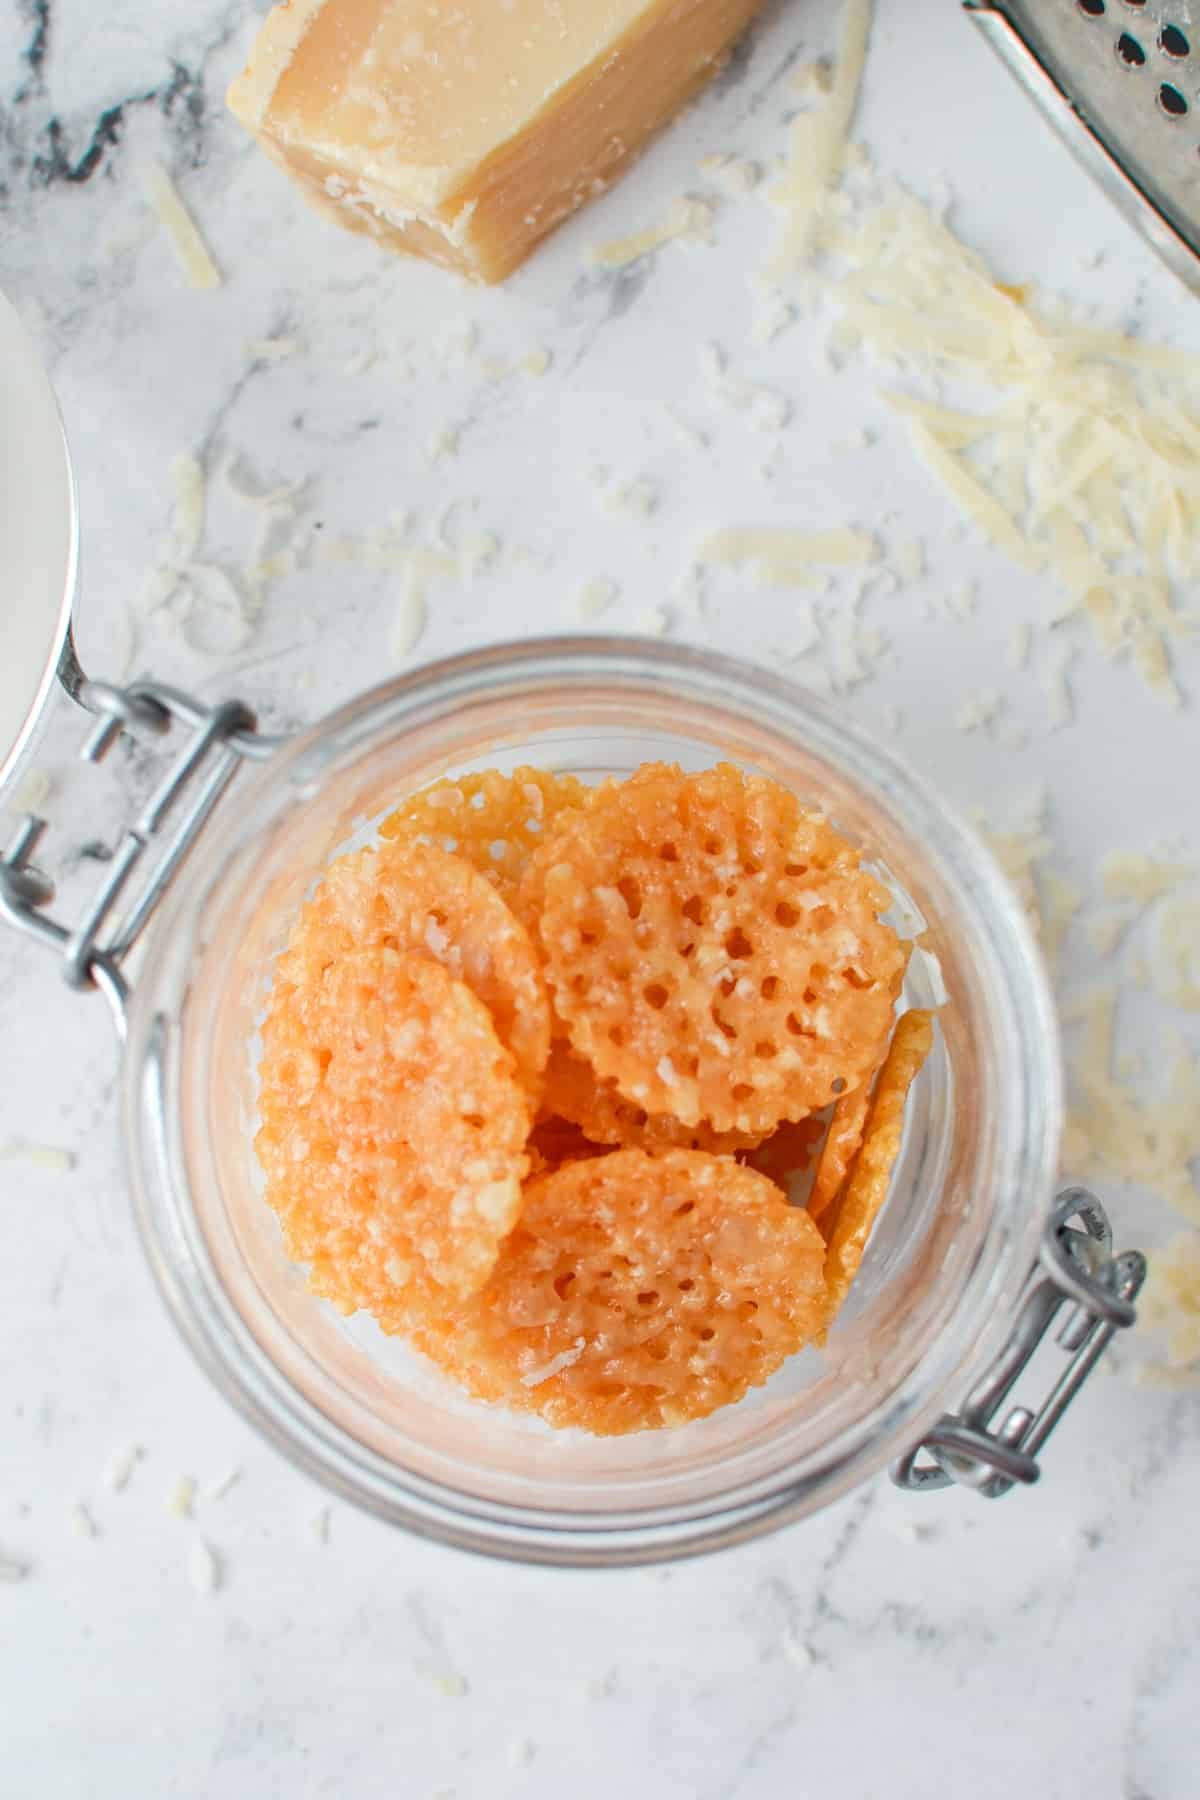
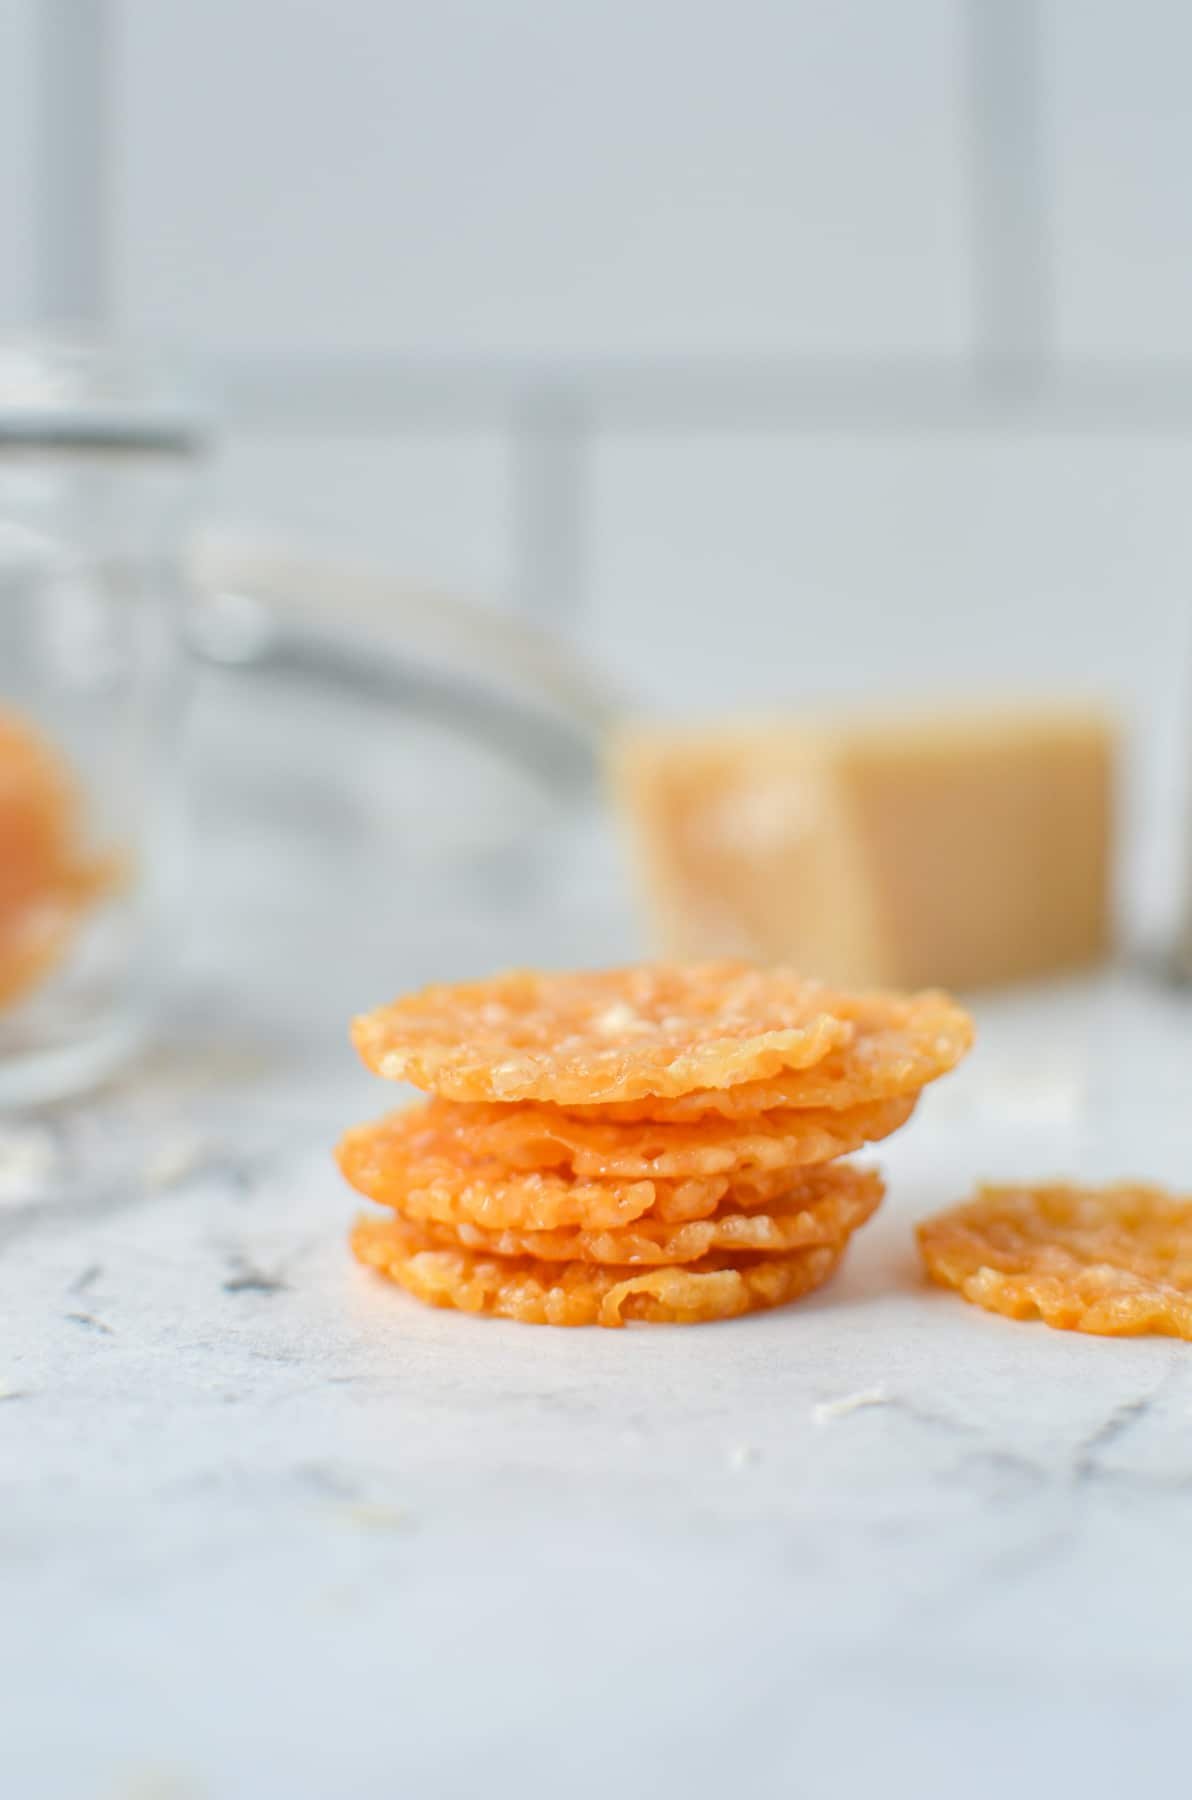
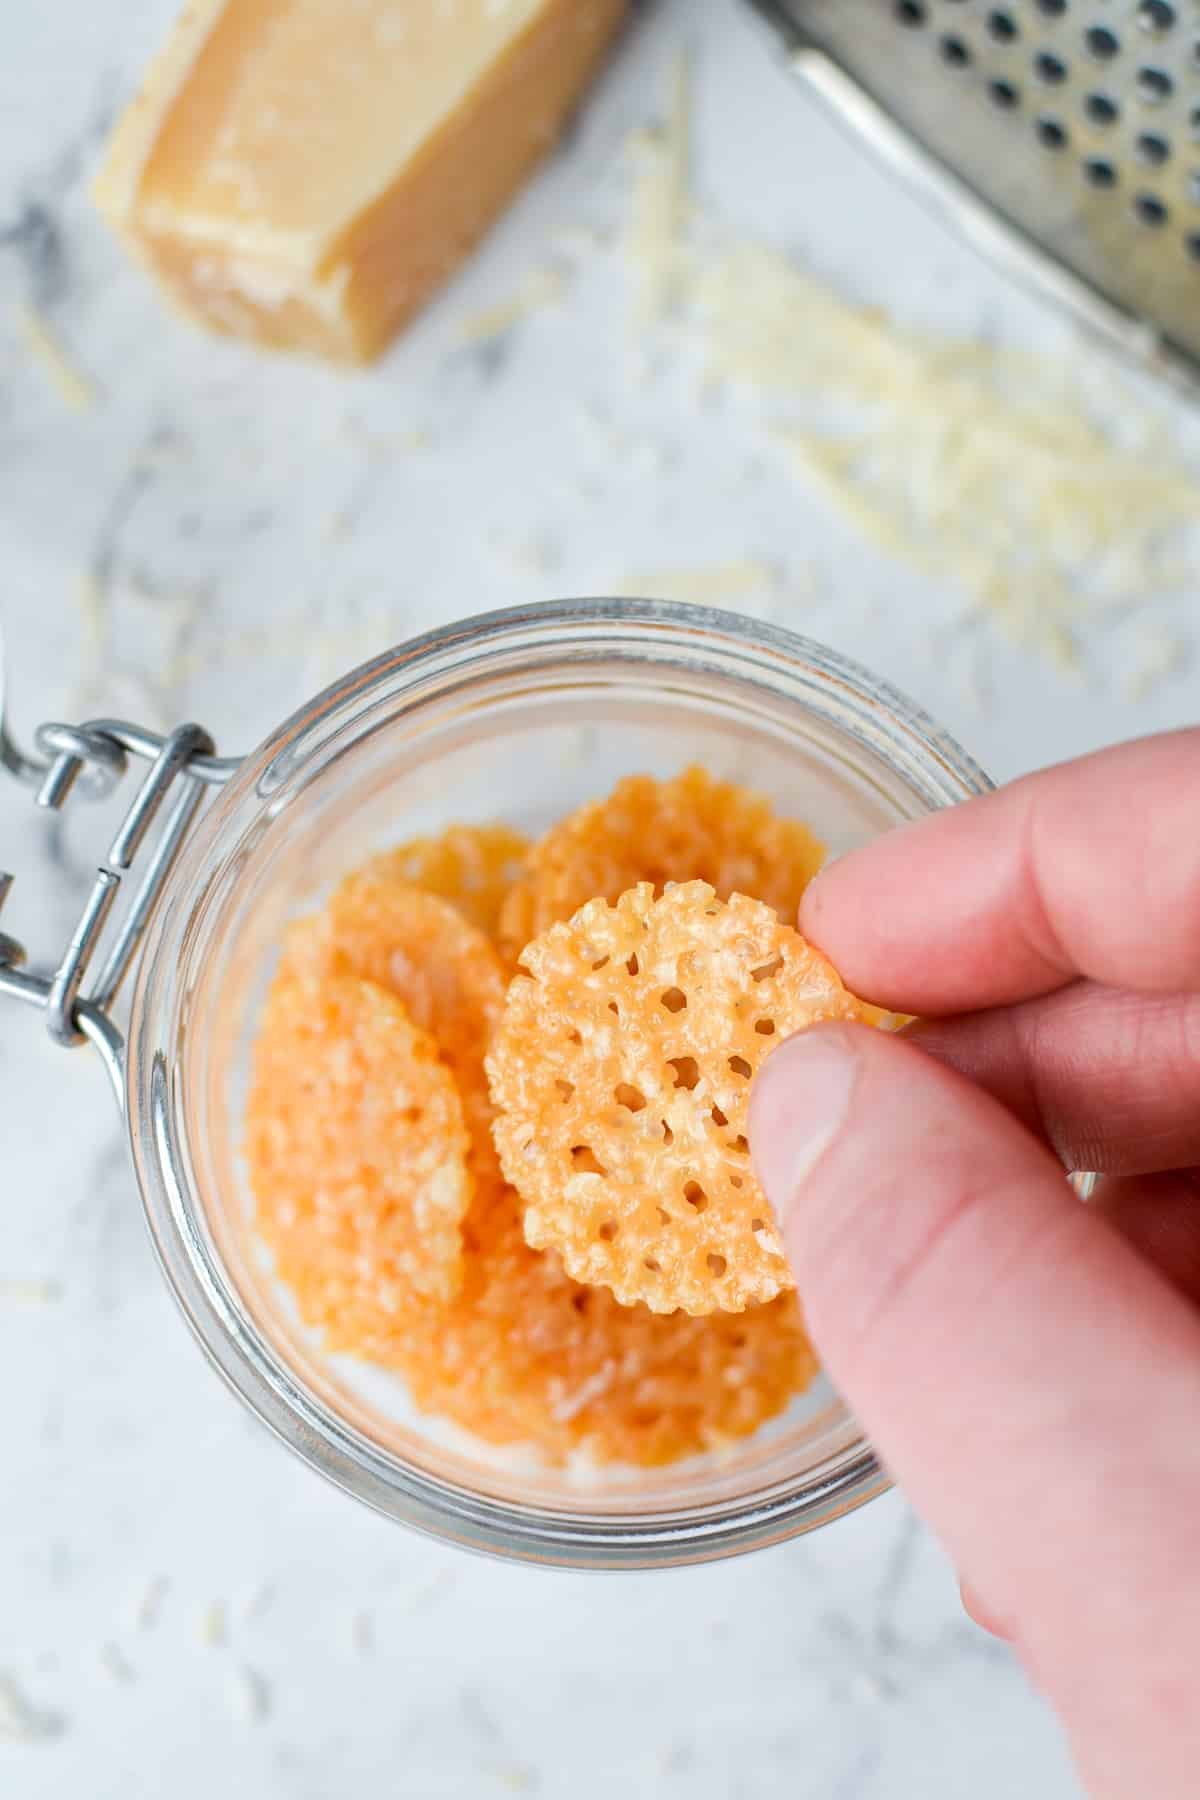
Step six: Once the parmesan crisps have cooled slightly, carefully remove them using a fork or a knife and transfer them to a tray lined with 2-3 layers of paper towel to drain (or a cooling rack).
Once the crisps are completely cool and drained, you're ready to serve!
No mini muffin pan? Use a sheet pan instead.
If you don't have a mini muffin pan to get the perfectly round chip effect, no worries! You can actually use a sheet pan instead.
I tested out this method with great success, and the parmesan cheese didn't spread out too much, making for delicious results.
- Mound 1 teaspoon of finely shredded parmesan cheese on a non-stick (or parchment-lined) baking sheet, leaving about 1-2" of space between each mound.
- Bake in the oven at 400ºF for 4-6 minutes.
- Allow the parmesan cheese crisps to cool in the mini muffin pan for 5-10 minutes.
- Carefully remove the chips with a fork or butter knife and place on a paper towel lined plate. This will remove any excess grease.
- Cool until crisp, then serve and enjoy!
Larger Batches
If you would like to, you could double, triple, or quadruple the recipe while working in batches. Just be sure to not make more than you can eat in about 2-7 days.

Ways to Use Them
You can use these homemade parmesan crisps anywhere you would use a cracker, croutons, OR parmesan cheese. They are a great low carb option for a crunchy, savory snack. Here are a few suggestions:
- Caesar salad: Love the salad, miss the croutons? Swap them for parmesan chips which are both gluten-free and zero carb.
- As a cracker: Top with cured meats, additional cheese, or creamy spreads.
- Crushed: If you want to add the perfect crunchy and cheesy touch to a homemade casserole, but would rather skip the breadcrumbs - go for crushed parmesan crisps instead!
- Crouton substitute: Use them anywhere you would use croutons.
- On soups: These are absolutely delicious when added to a cozy, warm bowl of soup. The soup starts to soak in and they become soft, yet with little crunchy bits and the results are just delicious.
- For dipping: Try your favorite dipping sauces like ranch, buffalo, or garlic parmesan.
- Snacking: OR you could do what we do about 90% of the time, which just is to eat them as is because they are so satisfying and delicious. Easy peasy!
Storage Tips
So your savory and crispy parmesan chips are fully cooked, cooled, and ready to go. Now what? Well, if you didn't plan on using them right away for a snack, they can easily be stored for later.
- Add them to an airtight container (or plastic storage bag) and seal them tightly. Just make sure that they are 100% cooled to room temperature because any condensation in the bag or container will make them soggy.
- You can store them on the countertop for about 1-2 days, or in the refrigerator for up to 1 week. They do get quite chewy when stored in the refrigerator, so just be aware of that.
- Parmesan chips can be re-crisped in the oven or air fryer if desired.
Re-crisping
Your parmesan crisps should maintain their texture for up to 12 hours, but they can start to lose it as they store for longer periods (especially in the fridge). The good news is that you can easily re-crisp your crackers.
To re-crisp:
- Oven: Bake in a 400ºF (204ºC) oven for 2-3 minutes, watching them closely
- Air Fryer: Add them to an air fryer that has been preheated to 375ºF (190ºC) and cook for 1-2 minutes.
- Then drain on paper towels briefly, serve and enjoy!
How much cheese should I use?
I tested this recipe with a varying amount of finely shredded parmesan cheese per "crisp". My original goal was to make them thicker, yet crunchy, similar to the brand name "Whisps" parmesan crisps, which were the inspiration for this recipe.
I tested out using 2 teaspoons, 1 ½ teaspoons, and 1 teaspoon per mini muffin cup, as well as longer baking times.

Top Tip: Less is More
Overall, even though the larger amount created thicker parmesan crisps, they were too chewy for our liking. The best option that we tested was 1 teaspoon in each mini muffin cup (or mounded on a baking sheet).
Although the smallest amount made for a thinner parmesan chip, it was delightfully crispy and full of flavor - even better than the store-bought brand!
So ultimately, this is what we ended up going for once the recipe was fully tested. I think you'll enjoy their crispy texture and big flavor.
Flavor Variations
- Everything Bagel Seasoning: Sprinkle some everything bagel seasoning on top of the cheese before baking.
- Jalapeno: Add a slice of pickled or fresh jalapeno on top of the cheese before baking.
- Parmesan garlic: Sprinkle garlic powder on top of the cheese, according to your taste.
- Poppy seeds: Add a pinch of poppy seeds to each mini muffin well before baking.
- Black pepper: Add some freshly ground black pepper to your taste. Some flaky salt might be a nice touch, too!
Substitutions
Other cheeses: Feel free to experiment by substituting the parmesan cheese for your favorite aged or hard cheese. Romano, gruyere, and cheddar have all turned out well in tests. Just make sure to grate the cheese using the small holes on your box grater.
A mix of cheeses: In store-bought versions, it's not uncommon to see combinations of cheeses used to make cheese crisps. You can do the same with this recipe! Just substitute a portion of the parmesan cheese for another type of your choosing.
Recipe FAQ's
These should be fine at room temperature for about 1-2 days, but if you want a longer storage it's best to move them to the fridge. Once they are refrigerated they can become quite chewy, so they will need to be re-crisped in the oven or air fryer.
Almost any hard cheese will work for this recipe. Just be sure to use the small holes of your box grater for the best texture.
More Low Carb Recipes:


If you loved this recipe for Parmesan Crisps, let me know by leaving a 5-star review in the recipe card or comment below! You can also tag me on Instagram @dashfordinner.
Parmesan Crisps (Parmesan Chips)
Equipment
Instructions
- Preheat the oven to 400ºF and set out either a 24-hole non-stick mini muffin tin or a large-rimmed baking sheet lined with parchment.
- Measure 1 teaspoon of finely shredded parmesan cheese per hole in a mini muffin tin, or mound 1 teaspoon of cheese (evenly spaced) on a lined baking sheet.
- Once the oven has preheated, add the mini muffin tin or baking sheet to the oven.
- Cook for 4-6 minutes, or until the cheese is bubbly, melted, and brown. In tests, 5 minutes was the sweet spot.
- Remove the baking sheet from the oven and allow the parmesan crisps to cool in the pan for 5-10 minutes, or until they are no longer pliable.
- Line a plate or tray with 2-3 layers of paper towel, and gently transfer the parmesan crisps to the lined plate to drain.
- Once the parmesan crisps are completely cooled and drained they are ready to serve and enjoy.
Notes
Nutrition
Please note that some of my blog posts here at Dash for Dinner may contain affiliate links. If you make a purchase through these links, I will get a small commission at no additional cost to you. Please see my Disclaimer for more information.


Steve says
These were really crispy and delicious. Way better than the store-bought ones, and cheaper too.
Stacey K. says
You have some of my new favorite recipes. I can't wait to try this one tonight. I hope it's as good as the rest I have tried.
Kim Bailey says
So easy and. So delicious ... I found the recipe and they turned out perfect! Easy Peasy and so tasty!
Cindy Rose says
These cheese crisps were so easy to prepare. They were so tasty that I could hardly control myself. Can I make these in a larger size in a regular size muffin tin?
Dorothy Bigelow says
I haven't tried them in a larger muffin tin, but I think it would be worth a try!